Total Pageviews

Wednesday, May 5, 2021

Eagle Scout Court of Honor Party Ideas


The day has finally came!  After over 10 long years, my kiddo has been awarded his Eagle Scout Award.  I'm not going to lie, there was times I didn't think he would finish but with a little push, he was able to finishing the last few things he needed.  I'm very proud of him!  Enough of the mommy bragging and onto his party.  

I didn't get a lot of pictures because the day went by so fast but I was able to catch the ones below so I could pass on the ideas to other scout parents.

PARTY DECORATIONS

I started planning his party after he finished his Eagle Scout Project (which was building a Chimney Swift Tower for the local bird club).  It was right before 4th of July holiday so I was able to pick up a lot of Flag decorations for his theme.  There really isn't a lot of Eagle Scout decorations to be found and they ones that are out there is rather pricy.  


As this was an outdoor party, I got creative with the table holders so the wind wouldn't blow the table clothes away.  The tables was covered in red, white and blue table clothes.  I made a picture from every year of his scouting journey in PowerPoint, adding the patch, troop number, rank and year he received that rank.  The cups came from the Dollar Tree, along with the tiny clothespins.  I bought the wood dowels from Walmart and used hot glue to attach everything together.  Inside the cups, I used rocks to make it heavy.  And as this was the time of COVID, I also had tons of Bath and Body hand sanitizers everywhere.  The cost was around $1 each.   


I made these centerpieces for around $4.  I used the mason jars I had on hand and used hot glue to attach the burlap ribbon under the red/white/blue ribbon.  Both can be found at Walmart.  I printed out a copy of the Eagle Scout Patch and glued it to the front.  For the inside, I filled with rocks, red/white/blue flowers with an American Flag, which all can be found at the Dollar Tree during 4th of July holiday.


I also thought since this was a Boy Scout Event, it would be nice to give everyone something nature related as a thank you for coming.  I found these wildflower seed leaf paper on Esty.  I made the brown thank you cards using card stock and attached the leaf with a glue dot.  I found the small bags at the Dollar Tree which fit perfectly.  On the backside, I added a small sheet with instructions on how to plant which came from the seller.   


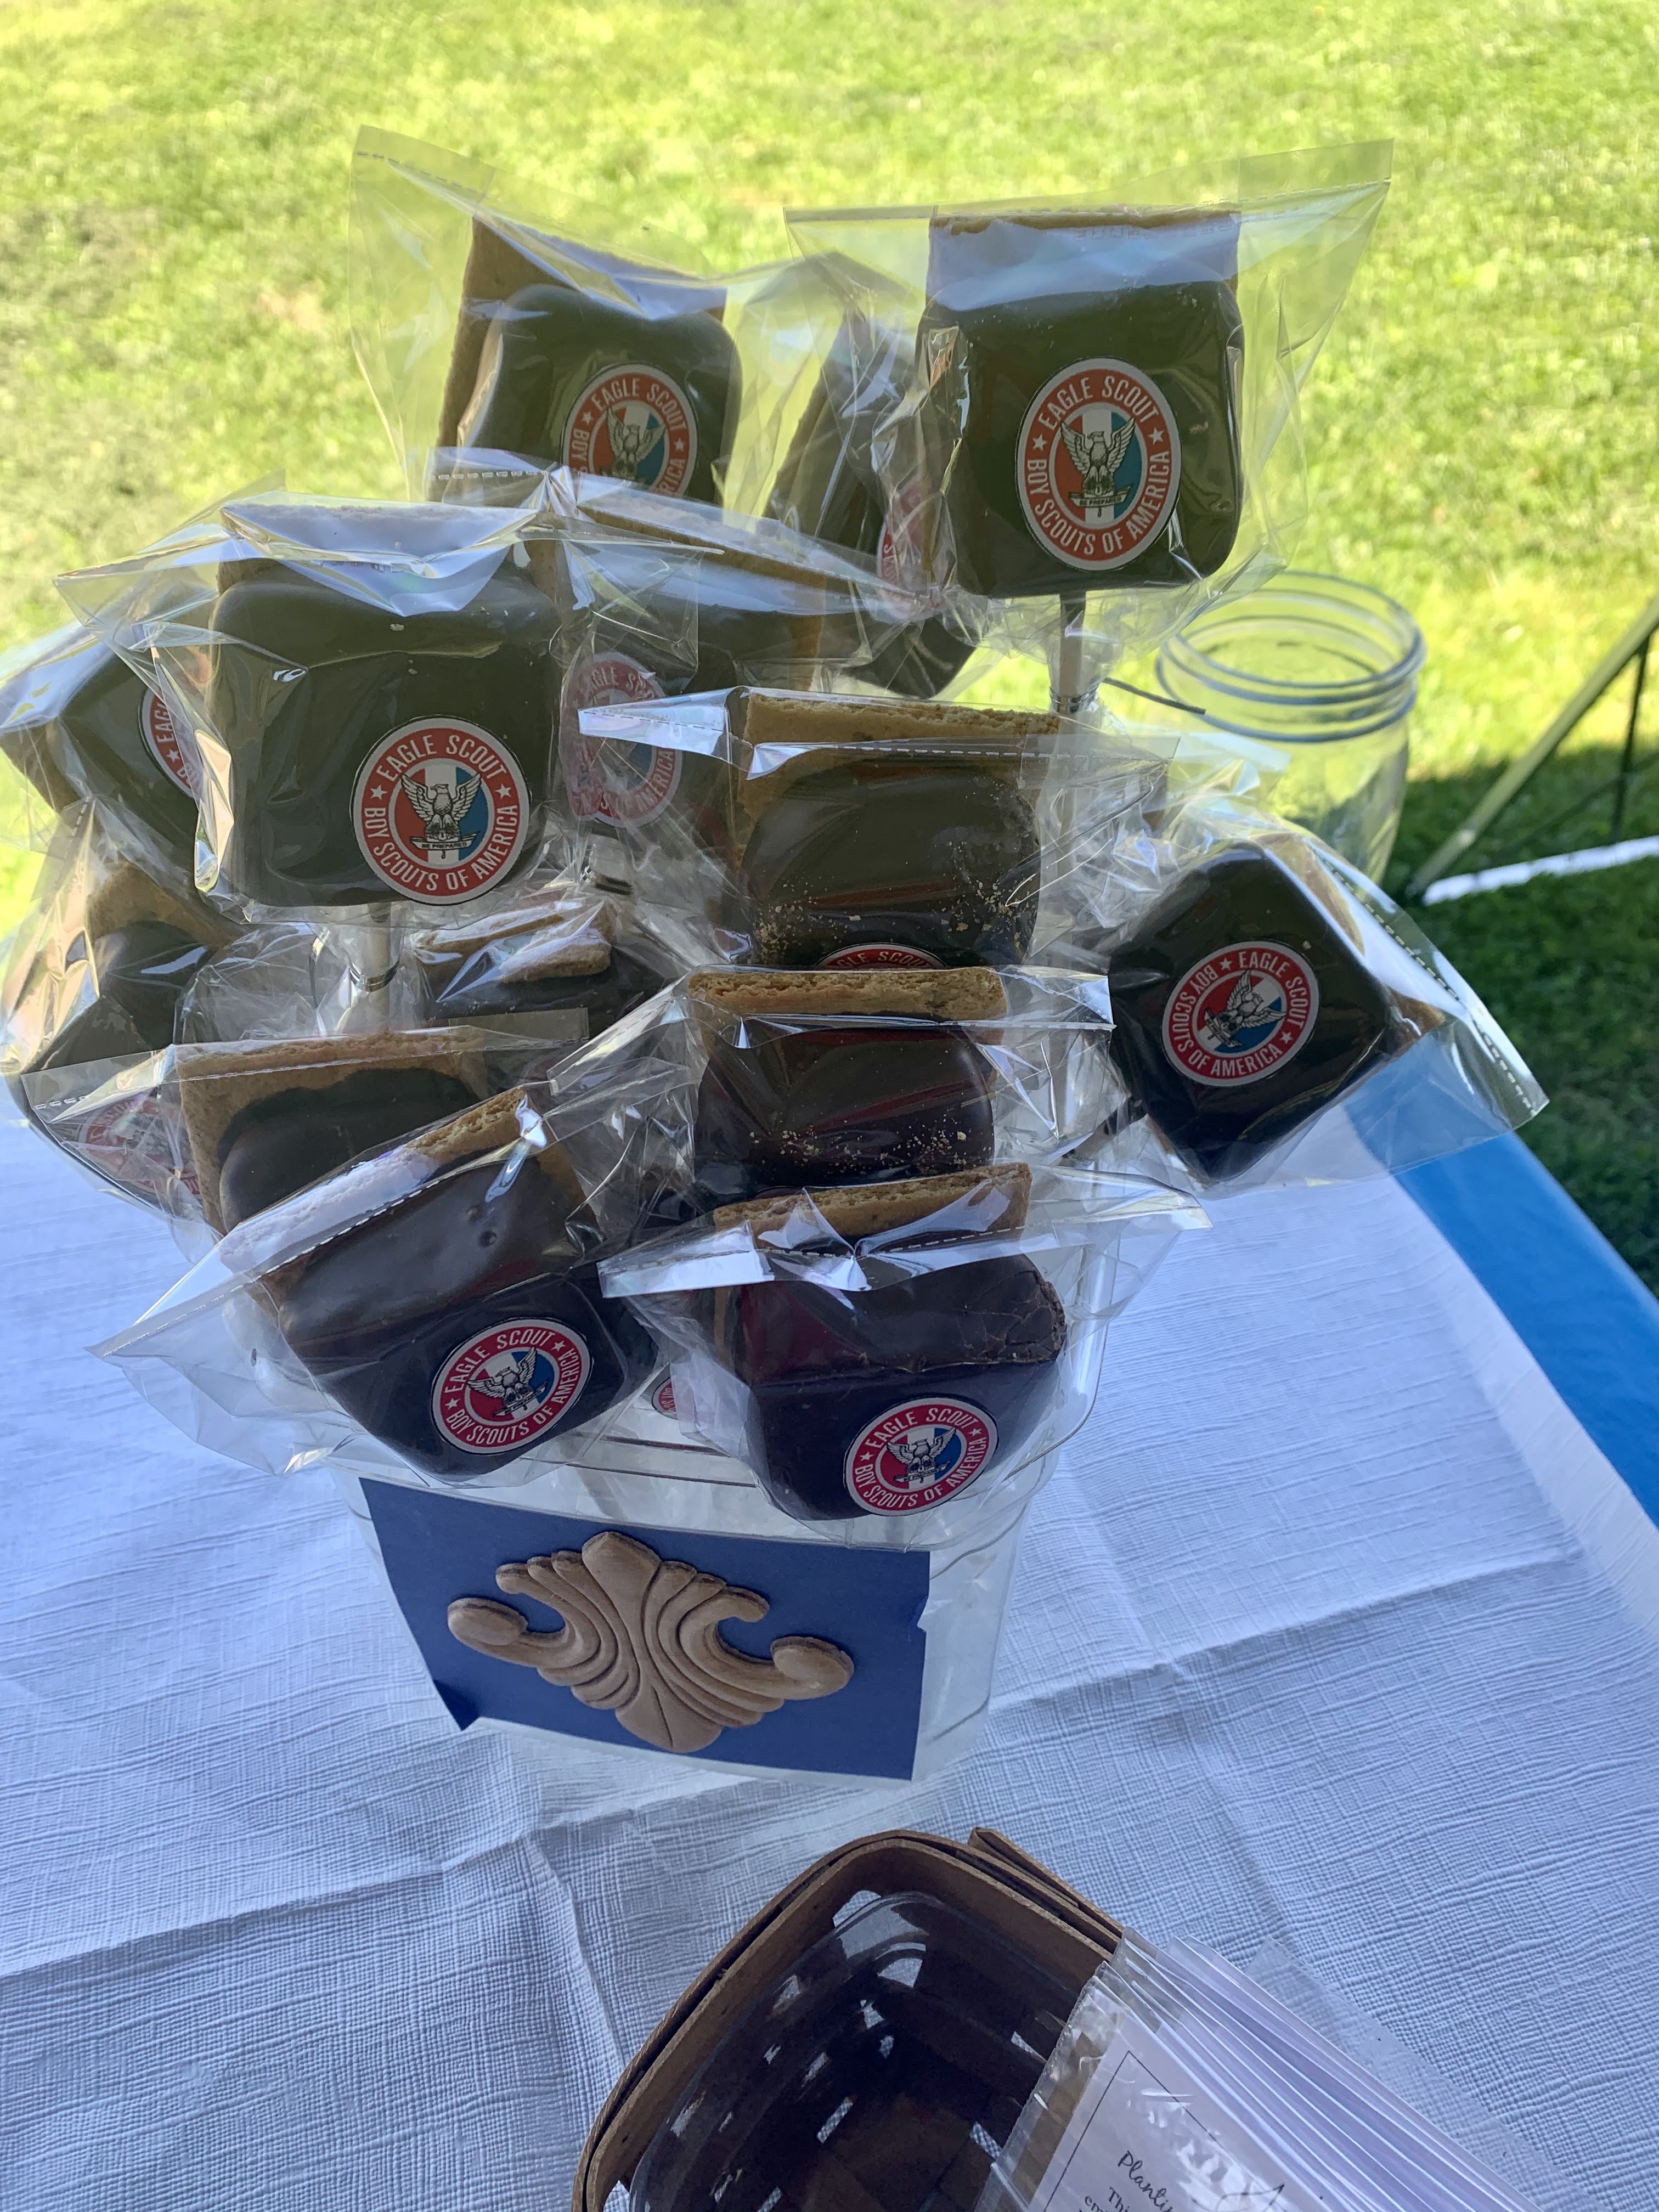
One of my favorite treats to make for parties is the Smore's on a stick.  These are so easy to make and always popular at my parties.  The kids just love them and the adults like to take them home to eat later.  Follow the below simple instructions on how to make them if you want to add them to your party.  I also printed off Eagle Patches and used glue dots to add to the outside bags to give it a personal touch. 

To make Smore's on a Stick:  I use sucker sticks and push through large marshmallow squares.  Melt chocolate blocks using a double boiler and dip the sticks in the chocolate, placing on gram cracker to dry.  Once dried, place in candy bags.  All ingredients can be found at Walmart. It's that simple!


The 4th of July M&M's also was a huge hit.  Every single bag was eaten!  I bought the M&M's from Oriental Trading which was cheaper then buying directly from M&M.  I used 1/2 cup snack bags, adding 1/4 cup M&M's, and then folding the bag in half, attaching it to the back with tape.  I printed the picture out and used glue dots to attached.   


My idea for the guestbook was finding something that I could put inside his Eagle Scout Binder later.  I bought the drop frame from Walmart in their wedding section.  It had a saying on the glass but it was easy to scrap off.  I cut foam board to create the tree, using Elmer's glue to add tree details before painting.  I bought the Eagle medal at our local Scout Store and cut a small opening in the tree for it to fit.  The leaves and animals came from Amazon.  The sign was a small chalkboard that came from the Dollar Tree. 


After the party, I attached the leaves to card stock with glue dots and then slip in a plastic three ring cover which will fit right inside his Eagle Scout Binder so he can save everything in one spot. 

FOOD

Food was a little tricky as COVID was still hanging around.  I wanted to make stuff so our guests wouldn't have to use the same spoons while they get food.  My solution was to make everything all ready portioned to grab and go!  We also had pizza as it was easy to grab (not pictured).


The cupcakes came from Walmart.  You can request the Eagle with Flag edible background which fit in with our theme.  The woodland tree stumps came from Oriental Trading.  They are hard cardboard but really nice looking.  I plan to use them in future parties.  As this was an outdoor party, I covered each cupcake with plastic cups to help keep our wonderful insect population away from the goodies. 


What is a Boy Scout Event without a Smore's station?!  The wind was blowing pretty hard so the "fire" wouldn't light every well.  Luckily, I had some backup candles.  Always be prepared!


I bought these cool tin containers with lids from Amazon and they were perfect to hold individual salads and fruit cups.  I also put the salad dressing in little cups as well which you can find at Walmart.  To keep everything cool, I put ice in the bottom foil pan and then added the food pan on top.  The ice kept the metal chilled throughout the party.  


RECOGNITION LETTERS

What is an Eagle Scout Ceremony without a recognition letter display.  To make sure the letters did not get damaged, I slipped them inside zip lock bags.  The Dollar Tree had larger gallon bags which came in handy for the larger sized letters.  I then cut card stock to make the boarders.  I found stickers from the Dollar Tree which I wrote who the letter was from and if they were a Scout in the past.


I spent 2 hours setting up for the party and I still didn't have enough time to get all the decorations out.  It didn't matter as the party turned out to be successful, even with COVID!  I have added the links to some of the items I bought to help you find them.  Keep in mind, that over time, these items will go away and the links will be broken.  I hope some of my ideas can help you in your party planning in the future. 

Happy crafting!   


Monday, March 15, 2021

Building a Corner Pantry


When I bought my fixer upper house, I had grand ideas and I'm slowly marking them off one by one to make my house a comfy place to live.  My latest project was to build a corner pantry.  My kitchen did not have any extra storage so I installed a shelving unit (left picture) and have been using that for 10+ years.  I finally jumped with all the time I've had stuck at home during COVID and built a corner pantry for around $350. 

I wish I could give you a blue print of this project but we (my brother and I) had to tweak it as we went.  The basic idea was 16 inches for the out side walls and the door is 23ish inches.  For the shelves, I used a 12 inch wide board.  The shelves ended up being four feet for the long section and three feet for the shorter wall. 

Items Purchased (the items with (?) is the items I already had on hand:

9    2-4-8 Studs ($34)

2    Drywall ($?)

1    Drywall Screws ($?)

6    1-12-6 Whitewood Board ($89)  Shelves

6    1-3-8 Whitewood Board ($28) Shelf brackets

1    Screws ($?)

1    Door Jamb ($20)

2    Wood Shims ($3)

1    Door ($20) - found at a resale store!  It is very heavy.

1    Hinges ($9)

1    Door Knob ($10)

1    Trim ($6)

1    Trim Nails ($?)

1    Caulk ($4)

1    Gallon Paint ($27)


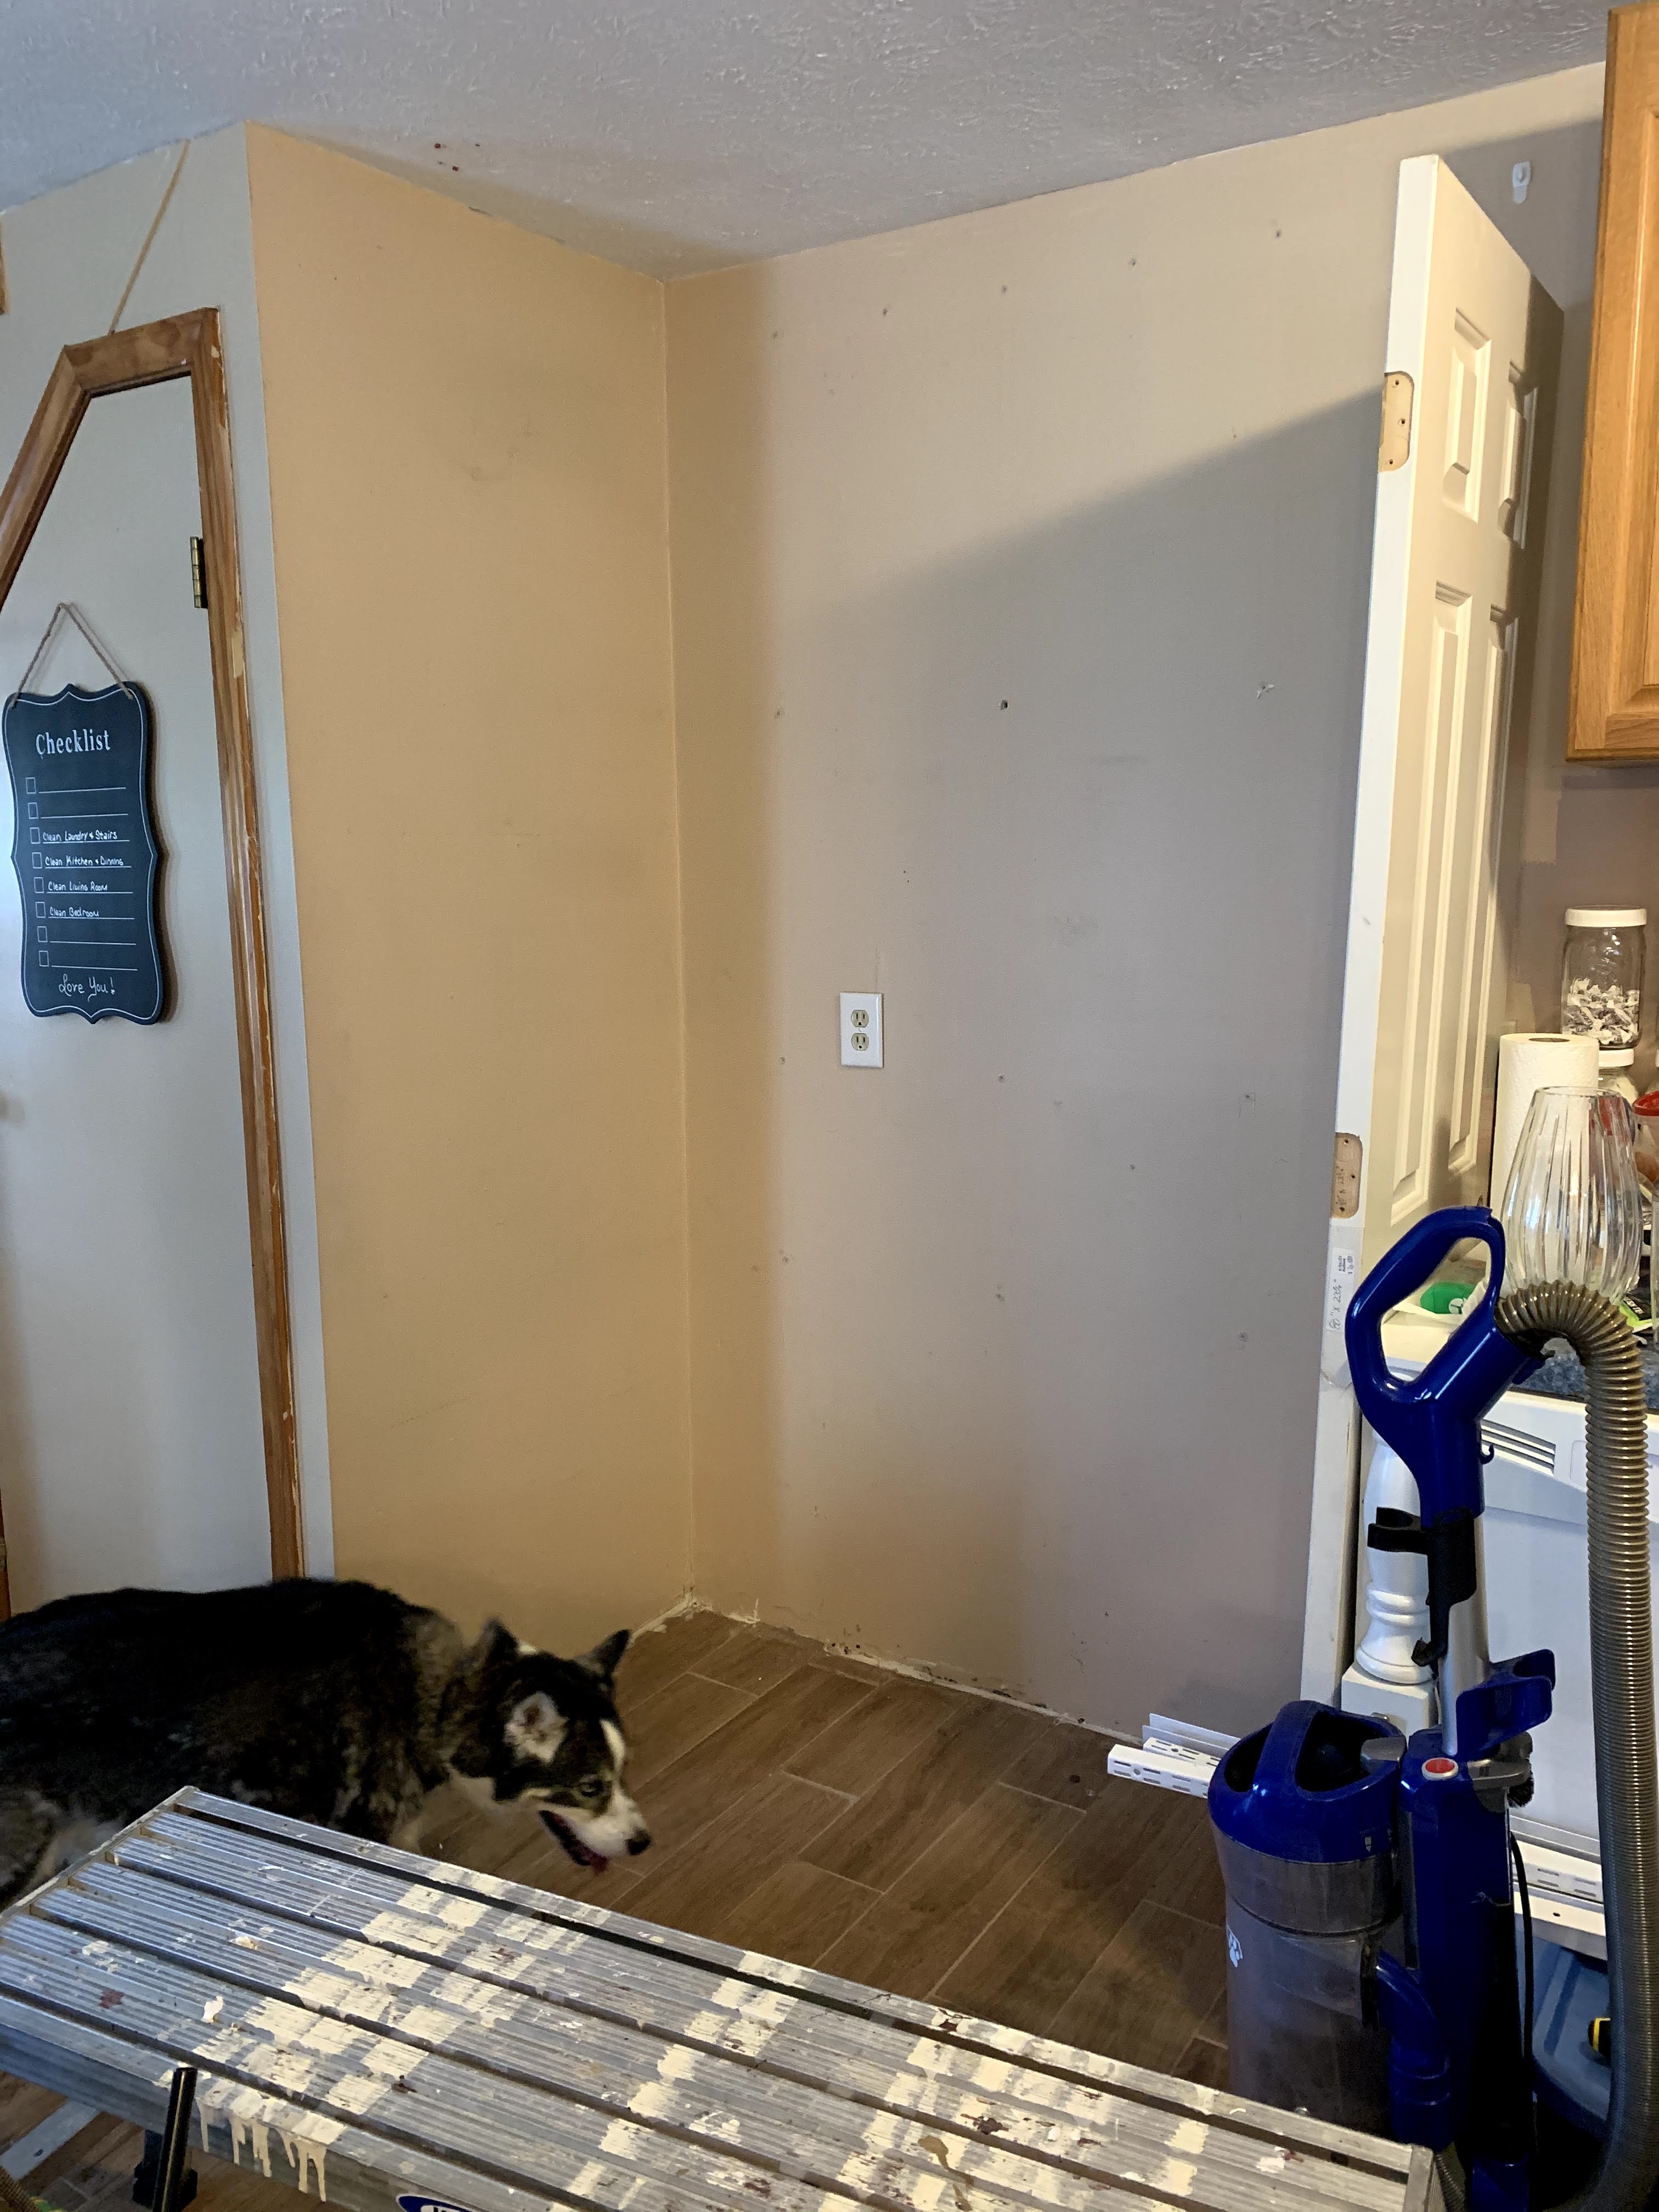
Meet my fur baby Scout!  He has to be in the middle of whatever I'm doing.  This is the space I was working with.  When I first moved into my house, this area had the refrigerator and a longer counter.  I cut the counter off and moved it to the other side of the kitchen, along with the refrigerator and shelves.

(BTW - make sure you hire someone that knows how to attached shelves to the walls.  The guy I hired, did not attach them correctly and one came crashing down.  I lost all my coffee mugs. 😥)
 

Next my brother built one side.  I only wanted it as big as the shelves, which was perfect.  I believe this was 16 inches, as the shelves was 12 inches.


For the other side, we had to make sure the door would fit so we went by that as to how big to make it.  He had to cut angles on this side to make it line up with the door but we still kept it at 16 inches.


The top part took a little skill and I was glad my brother did this part as I'm not that great at angles. 


While he was playing around with the angles, I went ahead and marked where I wanted the shelves to be with tape so I could get an idea of how many shelves I would need and what it would look like.  I wanted a few at different heights to allow for larger food items and a can dispenser to fit. 


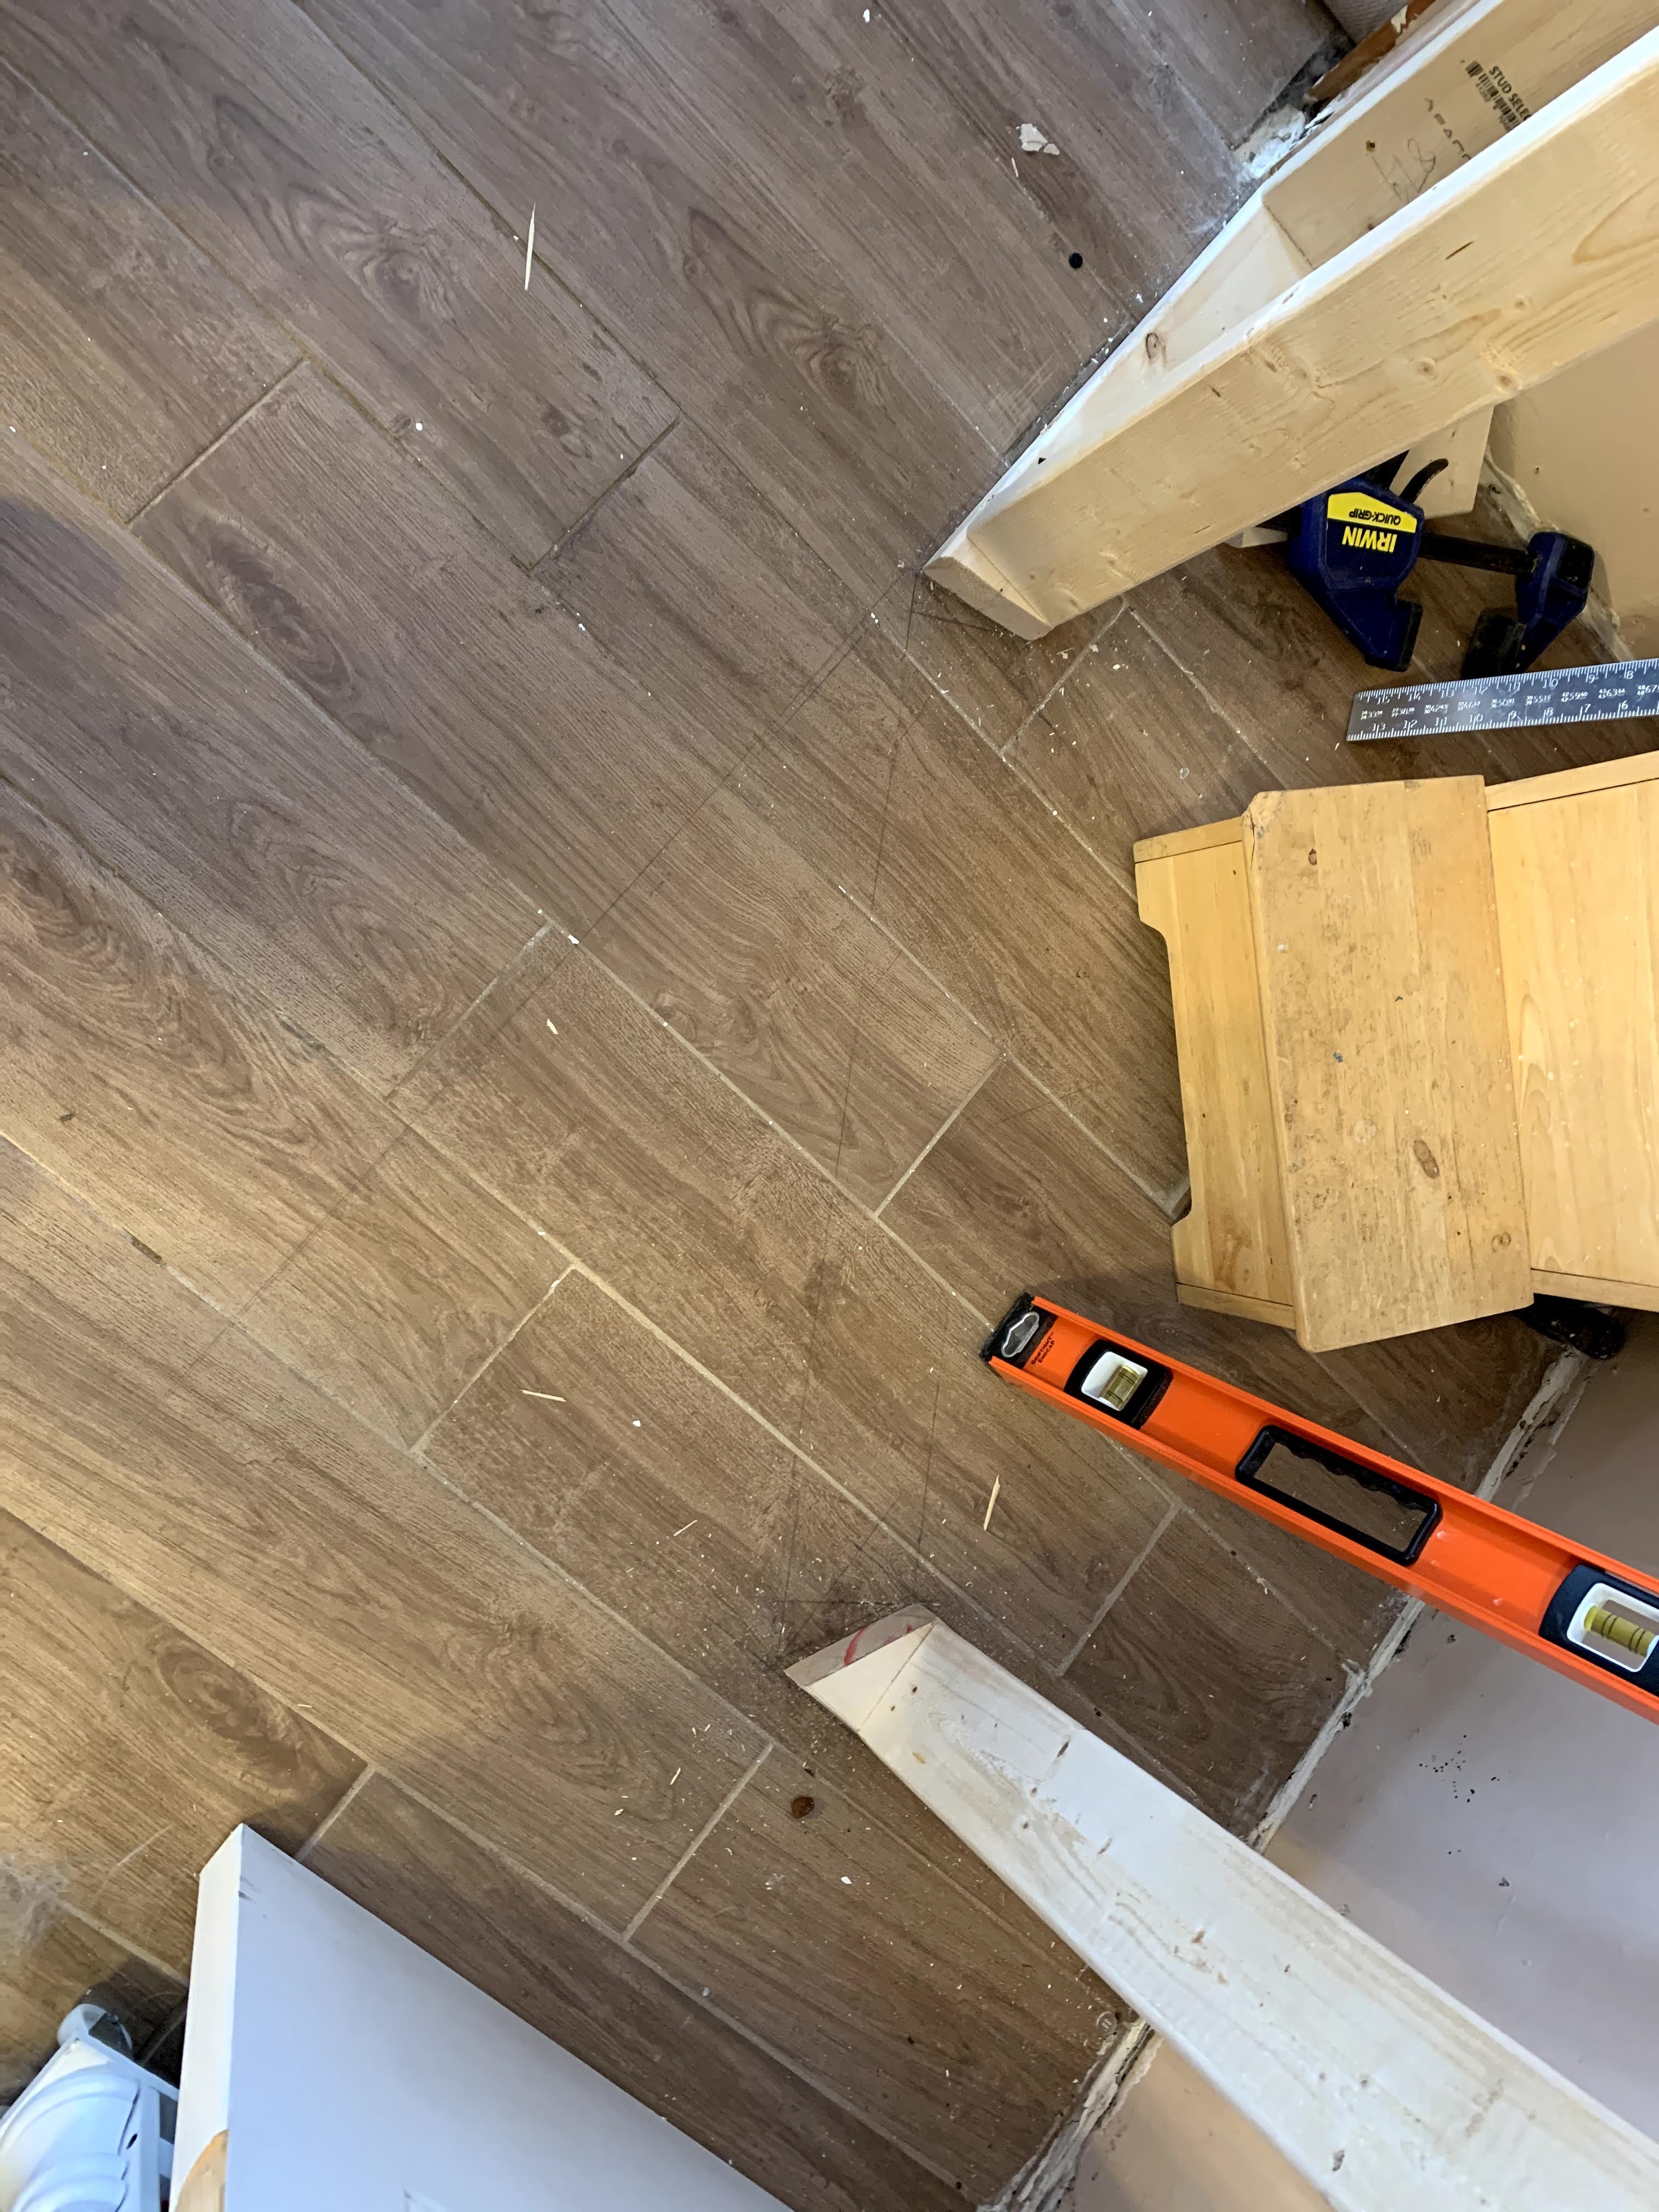
A close up of the angles for the door (the worst part of the job).  As you can see, it took some math skills to get the right angles for the door to hang correctly.   


Time for the door frame!  I was getting excited when I saw this going up.  I bought a kit from Lowe's which came with everything you needed to frame a door.


Door is up and the walls are being put in.  We made a small mistake with this, as the drywall didn't match up flush with the other wall.  It's something I will need to fix later on.


Both walls are up and I am so in love with this corner pantry!  It is perfect for this small space. I also wanted that small area left on the right so that I could put my water cooler in it.  I'm planning to build a few shelves above it beside the cabinets to give a little more storage for all my kitchen gadgets. 


I finished it up with the trim kit from Lowe's.  


Instead of installing a wired light, I bought a plug in light with wireless switch.  This worked perfectly as I had a plug already inside the pantry.  I hung it from the ceiling with a hook that has a lock on it so it wouldn't fall down if it.  I then attached the line against the side of the door frame and back of the shelf with wire hooks so you can't see it.


I hope this gives you an idea of how to build your own corner pantry!  I don't know how I ever lived without one.  It holds so much food, cleaning supplies and the dog food container.  

Wednesday, March 10, 2021

Simple DIY Recycling Trash Can

When I bought my house, it came with a small recycling bin.  Being a nature lover, I try to do my part in saving the world by recycling as much as I can.  Fast forward 10 years later and my small recycling bin has started breaking apart.  Plus, since my city only picks up recycling once a month, I was left with way more recycling bags then what would fit inside the bin.  


This left me searching for a new container.  What I found was really expensive at $100-$300!  I'm a penny pincher and budget lover so I decided to find a way to make my own at a fraction of the cost!


I found these 32 gallon trash cans with attached lid and wheels for $16.  I purchased Krylon Fusion All-in-one (Patriotic Blue) for $4.96.  


I also purchased recycling stickers off of Amazon (5 for $6 for $1.20 each).  So the total cost for the project was $22.20 before taxes!  As I have so much recycling, I bought two which still only comes to $44.40 and well under the price to buy a blue trash can.


We waited until a pretty day and went to painting!  It only took around a half hour to cover the cans.  I left it to dry over night and then touched up spots the next morning.  Overall, I love the way it turned out.  I'm now going to paint my other trash cans something colorful as well!  


Wednesday, August 19, 2020

Nutrisystem 5 Day Frozen Meal Box

In 2014, I wrote about my experience with the Nutrisystem 5 Day Weight Loss Kit and dropped 2.2 pounds in the first five days.  Overall, I liked the box but all the meal replacement bars were not my favorite.  I really dislike those things.  

Recently, I found that Nutrisystem has a FROZEN 5 Day Kit and I have decided to try it for the next 15 days.  The box arrived well packaged and still frozen.


Below is a pictures and what I thought of each meal.  I will keep you posted as to how much weight I lost every five days! 


I ordered 3 kits from Walmart and it was delivered within 2 days.  The food comes in a cooler with dry ice.  When I opened the box, it was pretty cold.  There was plenty of dry ice left and the food was all still frozen.  

BREAKFAST:

My first breakfast was the pancakes.  I'm not a huge pancake fan on any given day so I didn't have high hopes.  As far as taste, there really wasn't any without the syrup and the tiny piece of butter I put on them.  I ate them but without taste, I can't say that I liked them. 

My second breakfast was the turkey ham cheese omelet.  I'm not that crazy about omelets so I added some hummus to this in order to eat it.  It was pretty good.  I liked the chucks of ham but didn't really care for the egg.  I think I would have liked it more if it was scrambled.  Omelet people, I'm sure will love this.

The box gives you two cinnamon rolls.  So I had them for the third and forth day.  These really hit the sweet tooth and were very good after a few seconds in the microwave.  They were soft and tasty.  Although for some reason, I really wanted eggs on the forth day.  I'm kind of missing fresh food by the forth day. 

My last breakfast was the waffles.  I added syrup and peanut butter (something I started doing during boot camp to add that extra protein).  The waffles are matched to any frozen that you would buy.  I popped them in the toaster and they came out nice and crispy.  I could eat these over and over. 

LUNCH:

For my first lunch, I picked the Southwest Fiesta Melt.  I was really surprised that I really liked it.  If you like frozen burritos, you will love these.  Instead of a hard tortilla shell, the outside of this was soft and none of the inside filling leaked out.  I would not mind eating these all week.   

Day 2 lunch I picked the Pepperoni Pizza Melt.  Just like the Soutwest Melt, I really liked it.  It had the same bread but filled with pizza flavors.  Just like a pizza pocket but I like the bread on this product a lot more.  I would add this to one of my favorites. 

For lunch on the third day, I tried the hamburger.  I may have cooked it to long in the microwave as the bun on the bottom was hard as a rock in the middle.  I couldn't eat it but the rest was rather good.  I added some cheese, lettuce and mustard which is also allowed on the plan.  It was small but filled me up.  I will try less time to see if it changes the bottom bun later in this experiment. 

On the forth day, I finally at the grilled chicken sandwich.  It wasn't my favorite.  I added lots of hot sauce to give it taste.  It did it's job and filled me up though. 

On the fifth day, I had the four cheese melt.  It was ok but I added some salsa to give it a little more taste.  If you like grilled cheese, I'm sure you will like this.  It was filling and did taste rather good. 

DINNER:

My first dinner was the Chicken Parmesan and it did not disappoint.  The chicken was moist and had a great taste.  The pasta was soft and also rather tasty for a frozen meal.  I could have used a little more sauce BUT there is a reason why these are weight loss meals.  I would enjoy another one of these meals.

It was a pizza day for day 2.  I had the margherita pizza.  As for the pizza crust, it was surprising crunchy which I really enjoyed.  As for the toppings, I have never had a margherita pizza so I can't say if this one compares to that.  It was ok but I didn't care for the flavors.  I may change it up and add more veggies the next time I try it to see if that helps. 

For dinner on the third day, I picked the ravioli formaggio.  This was very tasty and I enjoyed the amount of sauce that went with it.  The stuffing was a little weird tasting but the sauce made up for it.  There was five ravioli in the meal which was plenty for me.  I could eat this again and again.

Fourth night was a turkey night.  I was craving mashed potatoes so I'm glad I saved this meal until the end.  I tried the potatoes without the gravy and didn't care for the taste.  I added the gravy, sriracha salt and pepper which ended up giving it a great taste and I enjoyed this meal.  It is a match to any other frozen turkey and mashed potatoes meal you would buy. 

Fifth day was the one I just knew I didn't want to eat.  The meatloaf sandwich (yuck).  I wouldn't eat this on a good day but I choked it down.  If you like meatloaf, I'm sure you would find this good.  I, however, did not like it and would not want to eat it again (but I have two more to eat later).  

SNACKS:

My first snack was the s'mores pie.  I got three words for you...I NEED MORE!  These are so good.  I would have preferred a more gram cracker crust taste but even without it, it was really good.  The chocolate and marshmallow was soft and melty.  The box only gives you one but I could have eaten these at the end of every day.  

Day 2 I wanted chocolate so I picked the cupcake.  The package does not say to warm it up but I really didn't want a cold cupcake so I stuck it in the microwave for about 15 seconds and it came out supper yummy.  It was the perfect amount of icing to give you that taste without the calories.  I could eat these every day.  So good.

Day three snack was the carrot cake.  I'm not that crazy about carrot cake to start with but this one wasn't bad at all.  It had little bits of carrots in it and the topping/middle had just the right about of sweetness.  As you can see by the picture, it didn't really look pretty and the middle was cut open right out of the package but it didn't hurt the taste any.  The package said to let it thaw but I tossed it in the microwave for 20 seconds and it was perfect.  

Forth snack was the red velvet cupcake.  Not really much to say as it was just like the other cupcakes.  Once warmed up, it was good.  

On the last day I had the ice cream.  I really don't care much for ice cream so I saved this one for last.  A fan of ice cream will love this.  It has a great chocolate taste and the brownie pieces are soft and chewy.  It was a little hard so I ate small pieces until it could thaw a little.  I normally keep tiny cups of vanilla ice cream for my dog to enjoy on hot days.  Scout just happened to see me get this cup out and went crazy cause he thought it was for him.  I ended up having to give him an ice cream as well!

OVERALL:

After five days, I have lost a total of 2.2 pounds and I didn't feel like I was missing out on anything or starving.  In fact, I skipped some of the extra's that I was supposed to eat (4 cups veggies, 2 SmartCarbs and 2 PowerFuels).  Each day was around 1200 calories.  It is a great program and helps me understand portion sizes, which is my biggest mistake.  I eat the same meals but I'm over eating at each meal.  

I have ordered two more boxes (10 days of food) and will continue in hopes of dropping five more pounds while using this.  I will let you know.