Total Pageviews

Tuesday, November 19, 2013

Yellow, Pink and Orange Bridal Shower


In 2012, I was asked to help with my nieces bridal shower.  She didn’t have a theme but really loved the colors yellow, pink and orange.  At first I found it hard really hard to come up with ideas without a theme but I worked my magic and was able to create a few really good ideas that made her shower special.

Guest Book:
 

Instead of doing the same old guest book, we came up with the idea of leaving envelopes and having each guest fill it out so my niece wouldn’t have to locate everyone’s address for the thank you cards.  I used a foam poster board and covered it with flowered gift wrap paper I found at the dollar store.  I then decorated it with their engagement picture and random pictures from their childhoods.  We also left the album filled with her engagement pictures for everyone to look at.

Advice Board:
I used another foam board with yellow gift wrap paper for the advice board.  I strung a string from to push pins and hung tiny clips with different color paper so the guests could fill out advice to the bride that should could put in her scrapbook.

Games:
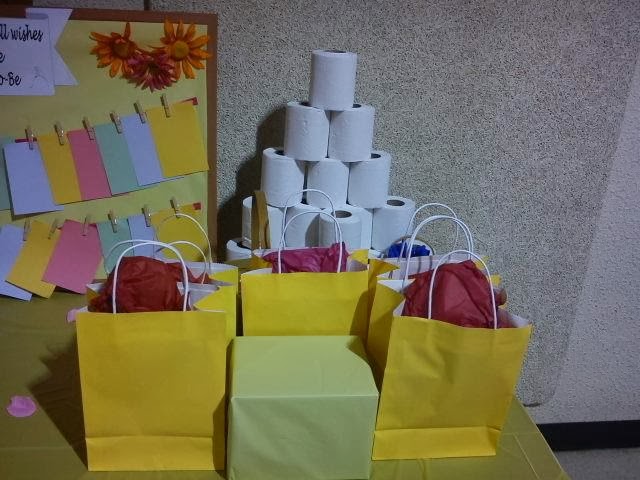
For the games we played several but the best was when each table picked a “Bride” and made a wedding dress for them using only toilet paper.  It was so much fun and we had a lot of creative “dresses”.

Favors:
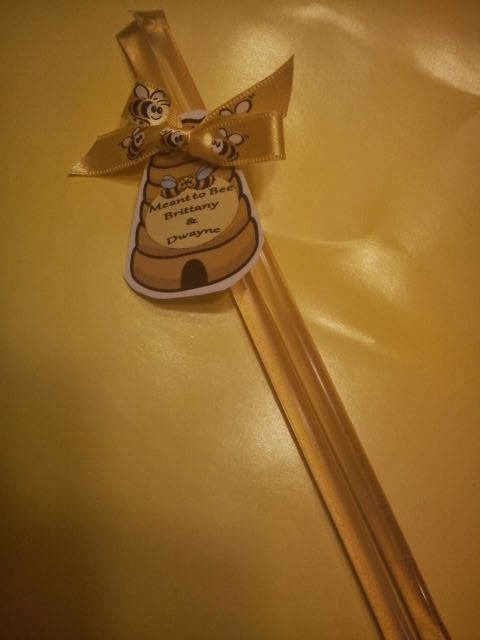
Creating party favors is my favorite thing to do.  I LOVE the idea of coming up with something and creating it from scratch rather than paying the huge price tag on party stuff.  Plus, if you do it yourself then you can put that special added touch that makes it stand out at any party.  I went with the yellow theme for the favors because of its warm and bright color.  When I think of yellow the first thing that pops in my mind is honey.  I really wanted to create jars of honey but after pricing the jars and the honey, it did not fit into my budget.  My next idea was to use sticks of honey and the Meant to Bee Honey sticks was created.

I ordered 100 honey sticks from amazon, along with the cute yellow ribbon with the bees on it. I created the tag and used glue dots to put the two sticks together.  I then tied the ribbon around the sticks and through the tag.  
I also made He Popped The Question and She Said Yes Bags (pink bags in the background) and added a microwave bag of popcorn and white paper.  I also made smores on a stick and used orange chocolate with chocolate hearts.
Last was my oreo truffles.  Everyone LOVES these and they are so easy to make for any party.  I always have tiny favor boxes on hand that I pick up at Wal-mart (100 to a box) for favors.  I picked up yellow flowers from the dollar store and pulled them off the stems.  I used a hot glue gun and attached to the top of the boxes.  I then used yellow ribbon that I also got at the dollar store to wrap around the box and added a tag made with card stock.  I used a cupcake liner and then added a truffle to each box.  

For my first bridal shower, it was a huge success.  The food was awesome but created by someone else, which is why I don’t have that on this blog.    

Monday, November 18, 2013

Snowman Wine Glasses


With Christmas coming up, I saw this local class on painting snowman wine glasses and grabbed a friends and off we went.  In our town we have a place called Uncork and Create which allows you to bring an adult beverage, snacks and friends for a night of painting fun.  Normally it's a painting you can hang on your wall but this night we painted wine glasses.  

You walk into this room filled with wonderful art work and find long tables in the middle of the room.  Chairs, aprons and all your supplies laid out just waiting to be made into your masterpiece.  There is an instructor that will walk you through each step on how to make whatever the project is that night.  

My friend open her bottle of wine and served it up as the instructor began our steps.  We painted the white first using indoor craft paint.  This is only one coat and I used small circles to get the snowy winter look.  We then put our first coat of paint on the bottom.  I picked green and red to keep with the holiday spirit.  By then the white had dried and we put on the faces and moved on to the second coat on the stem.  After more wine and a few giggles we used our talents to add that special touch to make each one stand out.  I tried for snow flakes and small specs of snow.  I then added eye lashes for my girl and a bow tie for the boy.  After the last of the wine, they were complete.

The instructor gave us instructions for when we got home.  Once I got home, I set the oven to 350 degrees and put the glasses in the cold stove.  I set my timer for 30 minutes and went off to do something else.  Once the timer went off, I shut the oven off but left the glasses inside to cool.  After the glasses was cooled I hand washed them in hot soapy water and served them up with orange Kool-Aid for my kiddo and myself at dinner.

Sunday, November 17, 2013

Ella's Paradise by A. Summberbell (Book Review)

I have been following Amanda's work since her first book, It Walked Among Us, and was excited to get my hands on Ella's Paradise. I purchased the hard back copy first but then grabbed the kindle version when she put it up for free just so I could have the extra copy to listen to while I worked.

Ella's Paradise, a treat for lovers of mystery/ghost stories, will have you wondering what will happen next with each page you turn. I'm a sucker for old houses and the history that follows them so this book had me interested from the beginning. The fact that it's around Halloween and the ghosts was an added bonus. Do not be discouraged by the number of pages listed. The paperback has close to 200 pages but the kindle only lists 152.

Leigh is a down on her luck woman who inherited her Uncles house (Ella's Paradise) after he mysteriously dies. Strange things start to happen pretty much as soon as Leigh moves in, from fresh flowers being left in the ballroom, to the sound of a giggling little girl echoing through the house in the middle of the night. With each new character brought into the book, Marin being my favorite, my mind was skipping ahead to see how this would change the story and what part they would each play in the end. Marin is Leigh's best friend and she had me cracking up. For example, "I prefer life among the living, thank you very much. That was beyond a close encounter, okay?" The book is a little slow at first as each new character is introduced but I promise the action picks up fast and you will not want to put it down until the end. The ending had a twist that I did not see coming and had me thinking how in the world did I miss this while reading. I found myself rereading the beginning that I thought was slow only to discover the hidden clues that were there for me to find.

This book gets five stars from me and I can't wait to read her next one. Amanda is going to be one of those writers I will be glad I've followed from the beginning.

Sunday, August 4, 2013

Girls Night Out - Come Fly With Me (1940's Theme Party)

Every year an organization in my city called, Girls Night Out, puts on these amazing parties to raise funds to help fight domestic violence.  This unique idea was started by High Hopes Committee and initiated by Sandy Graff and Elsier Carter in the fall of 1998 and labeled it "Party with a Purpose."  This year was the 15th such party and I was lucky enough to attend.  Over the years these parties has raised over $1 million dollars to help the YWCA Resolve shelter and Hope House.  

This years theme, "Come Fly with Me," required all women to dress in the 1940/1950's.  My favorite part was the hair.  I LOVE the way the women used to wear their hair in the victory rolls.  Thanks to pinterest, I was able to find several ideas and instructions on how to do this.  I practiced several days before the party to make sure I knew how to do it.  The problem was that the party was on Thursday night.  I worked Thursday and only had two hours to get ready.  My rolls didn't turn out they way I would have liked but I still had fun trying.  Make-up was another issue.  I really don't wear much of it and I NEVER wear lipstick.  From my research bright red lipstick was what they ladies wore so that is what I went with to complete my face. 
I also had a lot of fun looking for the right dress.  It just so happened that JCPenney had their summer dresses on sale for $10 so I was able to pick up this really pretty bright dress.  I added some cheap pearls from Wal-Mart and a pair of tear drop red earrings my mother-in-law had given me years ago.  I knew that there would be a lot of walking and standing so I picked some well broken in black heels.  Nothing fancy there because I didn't want my feet to hurt all night.  I did see several ladies who changed into flip flops by the end of the night.  I kept thinking it would be great to have some of those cheap ones that salon give you to wear after you get your toes painted in our gift bags.  Maybe next year.

The set up was rather nice.  The party was in a hanger at the airport and we had shuttle buses that would take us right to the hanger.  As we exited the bus there was guys waiting with drinks for us.  I'm not much of a drinker but I did try it and then tossed it.  The hanger had this really awesome old airplane that was a great place to take some really nice pictures with your friends.  The tables was really pretty.  Although there was not enough seats for as many people that was there.  By the end of the night this became more and more noticeable as everyone's feet started hurting.   I really enjoyed the large screen that played old black and white movies all night.  That was fun to watch and fit the theme nicely.

The food was provided by several local venders.  Each vender had their own tent set up and lots of finger food.  This set up could have been better.  There was a different plate with each vender and it made it hard to eat your food when there wasn't enough tables.  It was also kind of sad that three venders brought the same food (pulled pork on mini buns).  The food did fill us up and my niece was able to try sushi for the first time (and hated it).
 
Overall, I had a great night.  Some spots were a little boring but I will be going again next year. I also had the winning bid for a vintage pin-up photoshoot that I'm really looking forward to.  It was also kind of fun to wake up and see your picture on the front page of the newspaper.  
 http://gnowv.com/aboutGNO.php

Monday, July 29, 2013

Despicable Me Minions Birthday Party

This year for my sons birthday, he wanted to do a Minion Birthday Party.  I was very excited because I LOVE these cute little yellow things and couldn't wait to get started.  The only problem was, I couldn't find ANYTHING for his party that didn't cost an arm and a leg.  I'd rather spend the money on gifts and location rather than party stuff that will only get tossed in the trash later.

Food:
Since the party was also a pool party, I used sand buckets and filled with different treats.  We than had hamburgers (I forgot to bring the hotdogs) and chips.  I also brought small snack bags and filled with the remainder fishy crackers, animal crackers and pretzels and added to the goody bags so nothing got tossed in the trash or brought home at the end of the party.


Favors:
I was able to find the plastic party goodie bags at my local party store but the price tag was close to $4.00 for 8 and I really didn't like the look of them.  I decided to see what I could come up with at a cheaper cost.  I started by making a trip to my local Dollar Store.  There I found plan yellow gift bags 10 for $1.00.  Next I tried to find the eyes on the Internet but ran into the problem of how much it was going to cost just to download the template for the eyes.  I decided to create my own computer generated template. 
Here is a sheet of 10 different eyes you can use for your bags, cups or anything else you need. 
I printed them out on Avery 5163 Shipping Labels and than took the time to cut them out (which takes a while) and peeled and stuck to the bags.  I just created a template for the pants and then used a black sharpie to draw the pockets and things on blue card stock.  It was easy to just glue these to the bags.  I then used my sharpie to draw a mouth of different shapes and sizes.  My son wanted to help and added hair to the bags.  I had all the supplies on hand but the yellow bags, so 10 goody bags ended up costing me 10 cents each.

I also wanted to make little minions that could go into the goody bags.  I used the template for the eyes and then created the pants and made a sheet of labels that I could cut and add to the mini cakes. My trouble was finding cakes that didn't have writing on the package.  I had no luck there so I had to make do with what I could find.  I also put the leftovers inside the goody bags as well.


Cake:
I had a hard time finding cake toppers.  I was lucky enough to find this cupcake cake at my Kroger's and then found all the characters at ToysRUs.  It turned out rather great since I had his birthday party at the water park and didn't have to worry about cutting a cake.  The kids just grab the cupcake they wanted without an adult having to cut and put on a plate for them.


All and all it was a great birthday.  Everyone had fun and enjoyed the party.  I hope my ideas and templates help you create something magical for your little ones.

Saturday, July 27, 2013

Garden Retirement Party for my Co-Worker Rose

I met Rose close to four years ago and we became fast friends.  When I found out she was going to retire, after wiping the tears from my eyes, I started planning her party.  Most of my research came up with traveling themes and since she was not planning on traveling any place, I needed to come up with something else.  I know that she loves to garden and since her name is Rose it kind of made since to create a party around that.

Decorations:
For decorations I went with simple and cheap.  I found the template for the flower on Yahoo Images and printed them on colored card stock.  I then cut them out and punched a hole in the center for the Pops.  I found the brown plant starters in the garden section and stuffed it with a round styrofoam ball.  I found the foam flowers at the dollar store and added them to the outside.  They kept falling over so I added some fish tank rocks I had at home to the bottom to give it a little more weight.

Food:
For the knives, spoons and forks....i put a napkin in a flower pot and then placed the items inside to give it a more decorative look.  
 We ended up with a lot of food and it was all gone by the end of the party. 

 I took the buns out and placed them in my Longaberger basket. 
 A friend made the veggies in the flowerpot.  It was so cute and Rose was able to take the flowerpot home to reuse. 
 These are bite size Greek Salads made with Cheese, cucumber and tomato.

Next I made "Dirt Dessert", White Oreo Truffles, Banana Pudding and Cherry Cheese Cake.  I love making desserts :-)

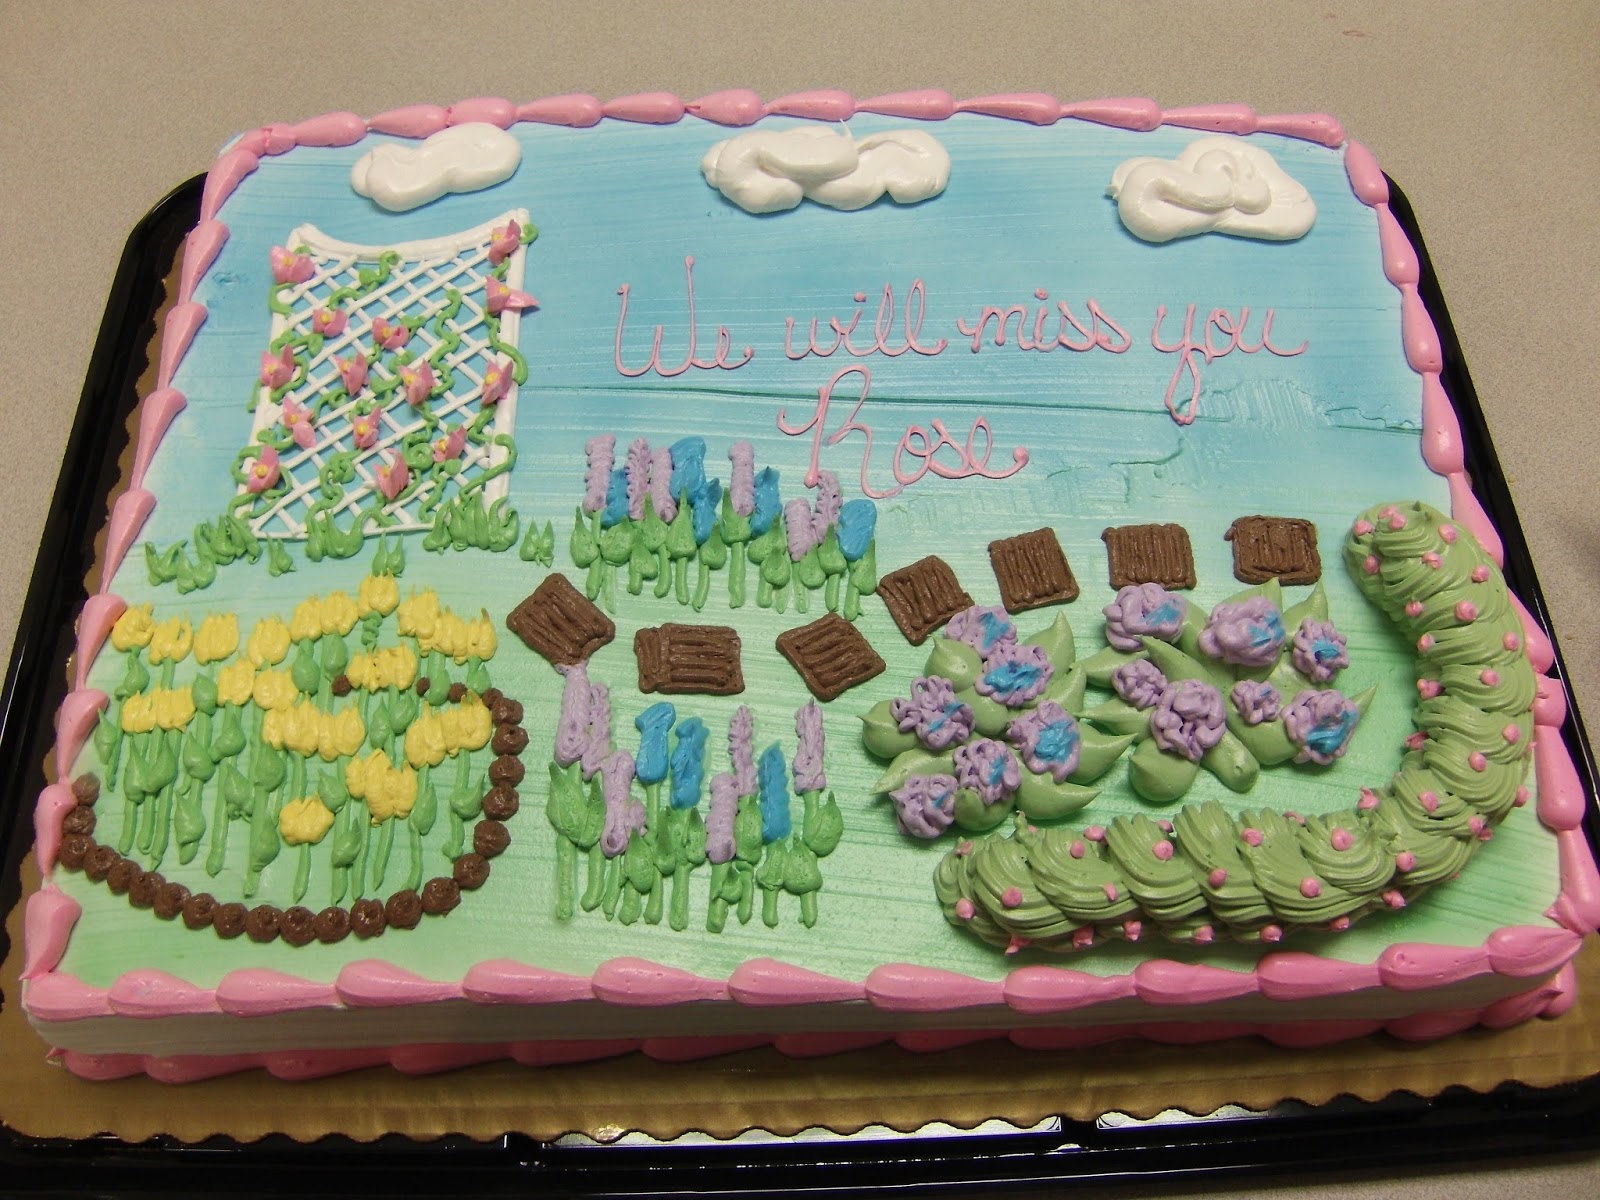
 The cake was made by Krogers.  We asked them to come up with a Garden Theme cake and this is what we got.  I think it looks awesome and is one of the best cakes I've had from Krogers.

 Gift:
Coming up with a gift was really hard.  What do you get someone that has everything?  We decided to go with the Garden idea again and just made a basket for her of things she could use.  
 I wanted something unique for all of your co-workers to sign to say good-bye besides a card that would more then likely be tossed into a box and forgotten.  We went with a coffee mug.  Everyone signed just a plan white mug with different color sharpie markers.  Allow the writing to dry 5 minutes before someone else signs so the ink has time to dry.  After it was finished I baked it in the oven at 350 degrees for 30 minutes.  I tested a small dot on the bottom to see if it would wash off and it stayed.  So now she has a mug she can use and think of us every time she drinks her coffee.
 After we figured out what to get her, the basket was rather easy.  Knee pad, flower wind things (can't think of the name right now), garden tools, bug candles, flower seeds, garden magazine, garden gloves and a bucket to put it all in.  Bug spray or sun screen would have been good but I didn't think of it at the time.
This party was both fun and sad.  I will miss my friend at work but am happy that she can now enjoy the time doing something she loves.  Hope you find some of these things helpful in any party that you may want to have.  

Wednesday, July 24, 2013

Lion King Baby Shower

Last weekend I put together a baby shower for my niece, Kasey.  Everyone knows that I HATE spending money on store bought favors so I like to design my own.  Below is party stuff and the information to help you make your own.

Guest Book:
Instead of using a guest book to sign in, I made a calendar for everyone to pick a date of when they think the baby will come. I made the calendar on PowerPoint and found the lion background print on Yahoo Images.  I then found a few baby Lion King images on yahoo and added it to the calendar to tie it in with the theme.  I found a picture frame at the Dollar Store and removed the glass.  I found pink hand and footprint stickers in the scrapbook section at my local Wal-Mart. These worked great.  Since this was an outside baby shower, I left bug spray out for our guests as a special touch.  


Table and Decorations:
I went with green table clothes and mixed and matched yellow and green plates.  I wrapped fork, spoon and knife inside of a napkin and tied with pick ribbon saying "It's a Girl."  I placed these inside a clear cup as sort of a center piece.

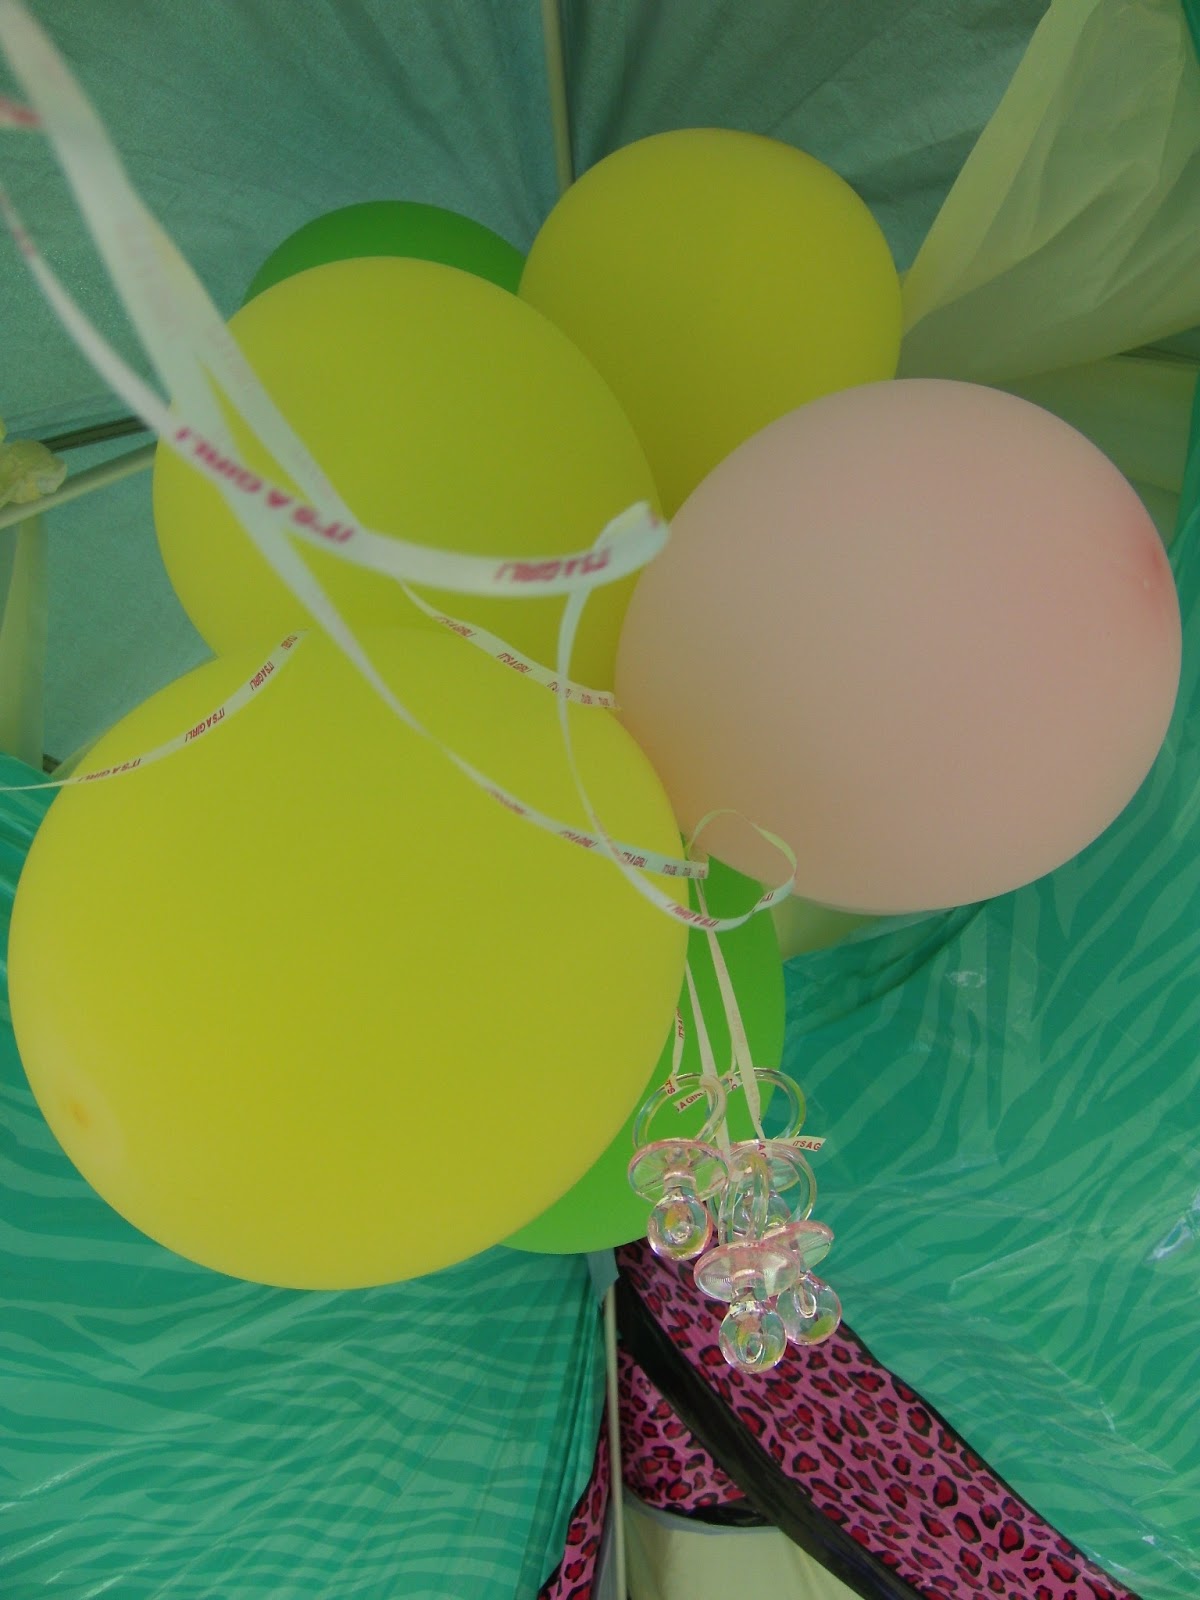
I had a pop-up shade tent that I hung plastic table clothes in different color to give the tent a more party feel.  This was a pain in the @** and I will not do it again :-)  I then blew up pink, green and yellow balloons and hung in the center with pink pacifiers hanging down with "It's a Girl" ribbon.  This was nice because every time the wind would blow you would here then cling together like a wind chime.


Games:
 For games I created a card style document which had all the games we were playing.  Below is the template I created.  I deleted Kasey's name and shower date to allow anyone else to use this idea for their party.  One game that is not listed is the play-doh baby.  Each person was given a small container of play-doh which I was able to find at Wal-Mart for 20 cents a piece.  Using the play-doh they had to create a baby.  It was pretty funny to see what everyone came up with.

Favors:
My favorite part of any party is the favors.  I always go over board but I love coming up with the ideas and creating each item.  For this party I did several different ones.  Since it was a Lion King party I had to do something with animal crackers.  I filled a snack size baggy with cookies and then taped it to green card stock.  I made the tags and printed on label paper and just peeled and stuck it to the card stock.  I love labels and use them like stickers ALL THE TIME!!!  Below is the template I created minus the name and shower date for anyone to use.
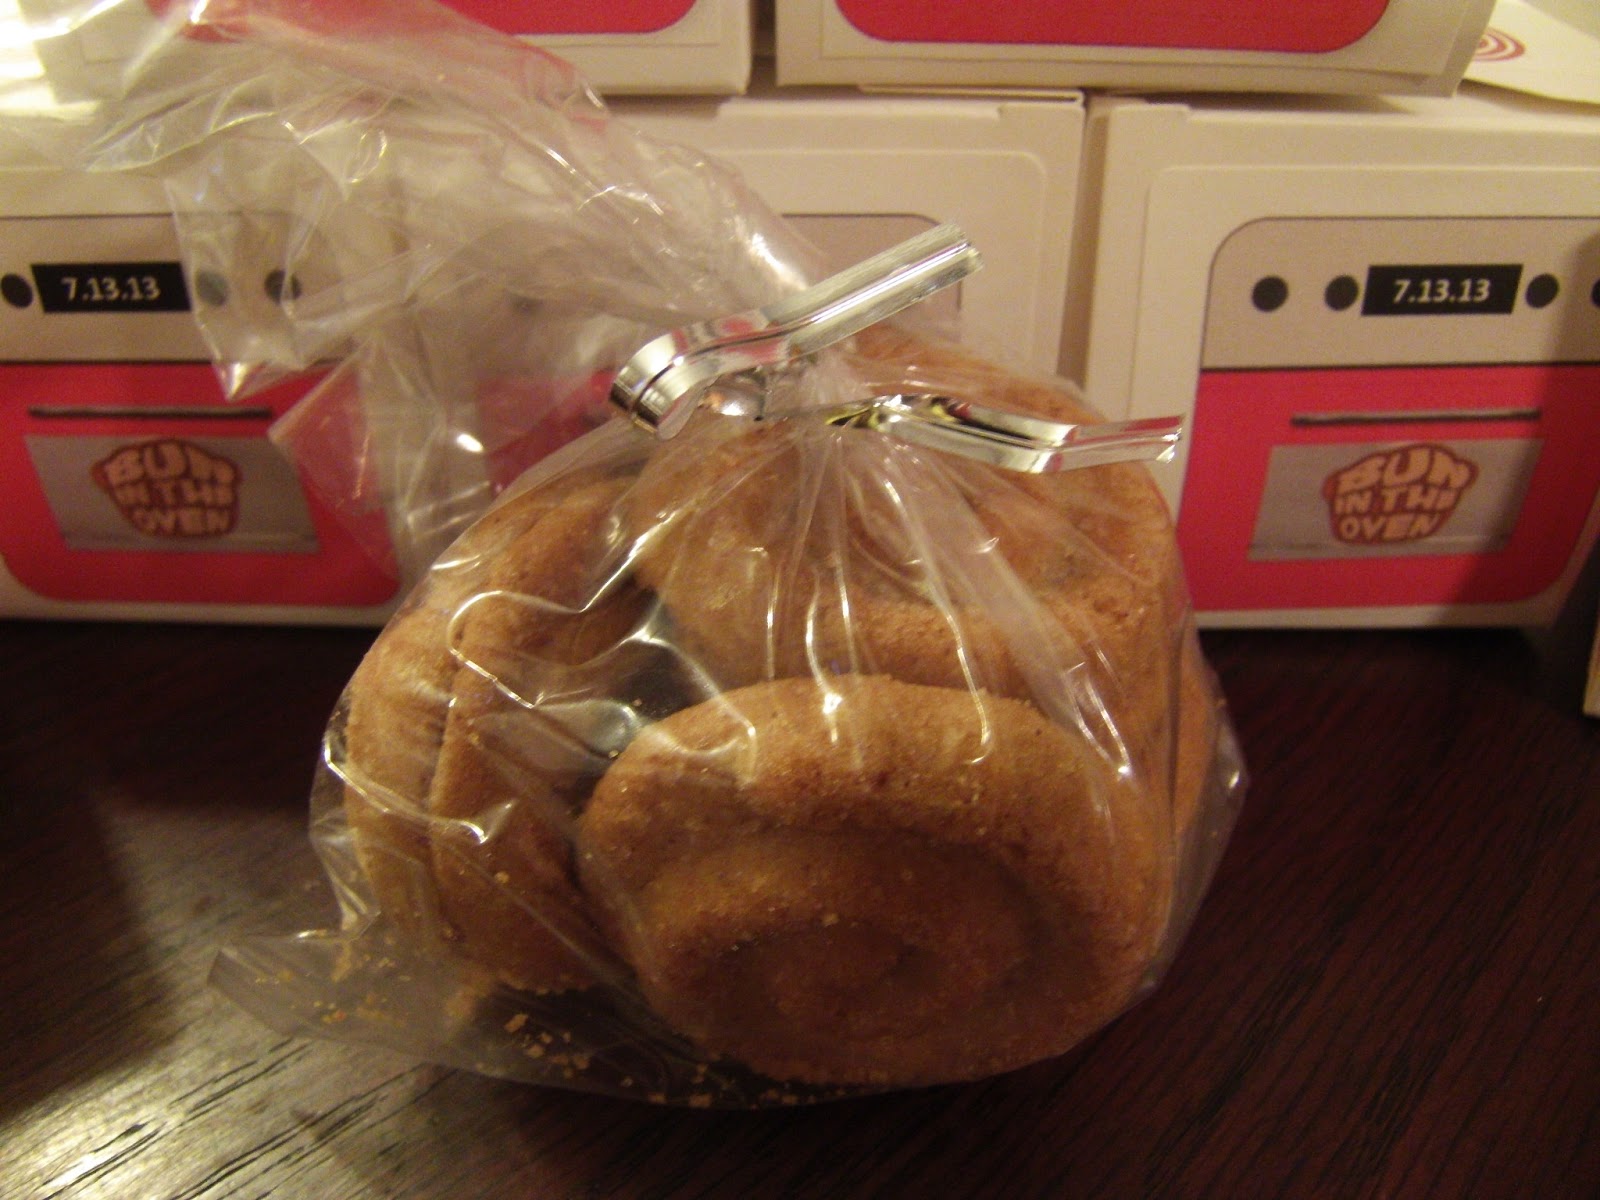
Next, I created "Bun in the Oven" boxes with Cinnamon bun cookies inside.  The small boxes I got on sale at Wal-Mart years ago.  I think I paid something like $5.00 for 100.  I use them all the time so if you find them on sale....grab them up!  I just happened to find the cookies by chance. I found the oven on Yahoo Images and added the "Bun in the Oven".  I also added the "time" as the date of the shower.  I created the stove top by using PowerPoint and then just found images of a towel and oven mitts to add.  I again used labels to print these images out on and then peeled and stuck onto the boxes. 

Last I created a peanut favor.  I found the boxes at the Dollar Store (10 for $1.00).  You can get a huge bag of peanuts for around $3.00 at your local store.  I also grabbed some yellow tissue paper to add a touch of color.  I found the monkey on Yahoo Images and added the saying along with Kasey's name and shower date.  I then printed it off on....you guessed it....labels! Below is the template you can use to make yours.

Other:
To add a little more fun to the party, I had a Diaper Change station set up where guests could leave a note for the parents on those late nights when all you want to do is sleep but your baby has other ideas.  Everyone had a blast coming up with cute things to say. 
 
For my first baby shower, I think this turned out really well and I was able to keep within a budget by doing a lot of things myself.  I hope this give others ideas of their own and you have has much fun as I did.

Until next time!