Total Pageviews

Monday, July 29, 2013

Despicable Me Minions Birthday Party

This year for my sons birthday, he wanted to do a Minion Birthday Party.  I was very excited because I LOVE these cute little yellow things and couldn't wait to get started.  The only problem was, I couldn't find ANYTHING for his party that didn't cost an arm and a leg.  I'd rather spend the money on gifts and location rather than party stuff that will only get tossed in the trash later.

Food:
Since the party was also a pool party, I used sand buckets and filled with different treats.  We than had hamburgers (I forgot to bring the hotdogs) and chips.  I also brought small snack bags and filled with the remainder fishy crackers, animal crackers and pretzels and added to the goody bags so nothing got tossed in the trash or brought home at the end of the party.


Favors:
I was able to find the plastic party goodie bags at my local party store but the price tag was close to $4.00 for 8 and I really didn't like the look of them.  I decided to see what I could come up with at a cheaper cost.  I started by making a trip to my local Dollar Store.  There I found plan yellow gift bags 10 for $1.00.  Next I tried to find the eyes on the Internet but ran into the problem of how much it was going to cost just to download the template for the eyes.  I decided to create my own computer generated template. 
Here is a sheet of 10 different eyes you can use for your bags, cups or anything else you need. 
I printed them out on Avery 5163 Shipping Labels and than took the time to cut them out (which takes a while) and peeled and stuck to the bags.  I just created a template for the pants and then used a black sharpie to draw the pockets and things on blue card stock.  It was easy to just glue these to the bags.  I then used my sharpie to draw a mouth of different shapes and sizes.  My son wanted to help and added hair to the bags.  I had all the supplies on hand but the yellow bags, so 10 goody bags ended up costing me 10 cents each.

I also wanted to make little minions that could go into the goody bags.  I used the template for the eyes and then created the pants and made a sheet of labels that I could cut and add to the mini cakes. My trouble was finding cakes that didn't have writing on the package.  I had no luck there so I had to make do with what I could find.  I also put the leftovers inside the goody bags as well.


Cake:
I had a hard time finding cake toppers.  I was lucky enough to find this cupcake cake at my Kroger's and then found all the characters at ToysRUs.  It turned out rather great since I had his birthday party at the water park and didn't have to worry about cutting a cake.  The kids just grab the cupcake they wanted without an adult having to cut and put on a plate for them.


All and all it was a great birthday.  Everyone had fun and enjoyed the party.  I hope my ideas and templates help you create something magical for your little ones.

Saturday, July 27, 2013

Garden Retirement Party for my Co-Worker Rose

I met Rose close to four years ago and we became fast friends.  When I found out she was going to retire, after wiping the tears from my eyes, I started planning her party.  Most of my research came up with traveling themes and since she was not planning on traveling any place, I needed to come up with something else.  I know that she loves to garden and since her name is Rose it kind of made since to create a party around that.

Decorations:
For decorations I went with simple and cheap.  I found the template for the flower on Yahoo Images and printed them on colored card stock.  I then cut them out and punched a hole in the center for the Pops.  I found the brown plant starters in the garden section and stuffed it with a round styrofoam ball.  I found the foam flowers at the dollar store and added them to the outside.  They kept falling over so I added some fish tank rocks I had at home to the bottom to give it a little more weight.

Food:
For the knives, spoons and forks....i put a napkin in a flower pot and then placed the items inside to give it a more decorative look.  
 We ended up with a lot of food and it was all gone by the end of the party. 

 I took the buns out and placed them in my Longaberger basket. 
 A friend made the veggies in the flowerpot.  It was so cute and Rose was able to take the flowerpot home to reuse. 
 These are bite size Greek Salads made with Cheese, cucumber and tomato.

Next I made "Dirt Dessert", White Oreo Truffles, Banana Pudding and Cherry Cheese Cake.  I love making desserts :-)

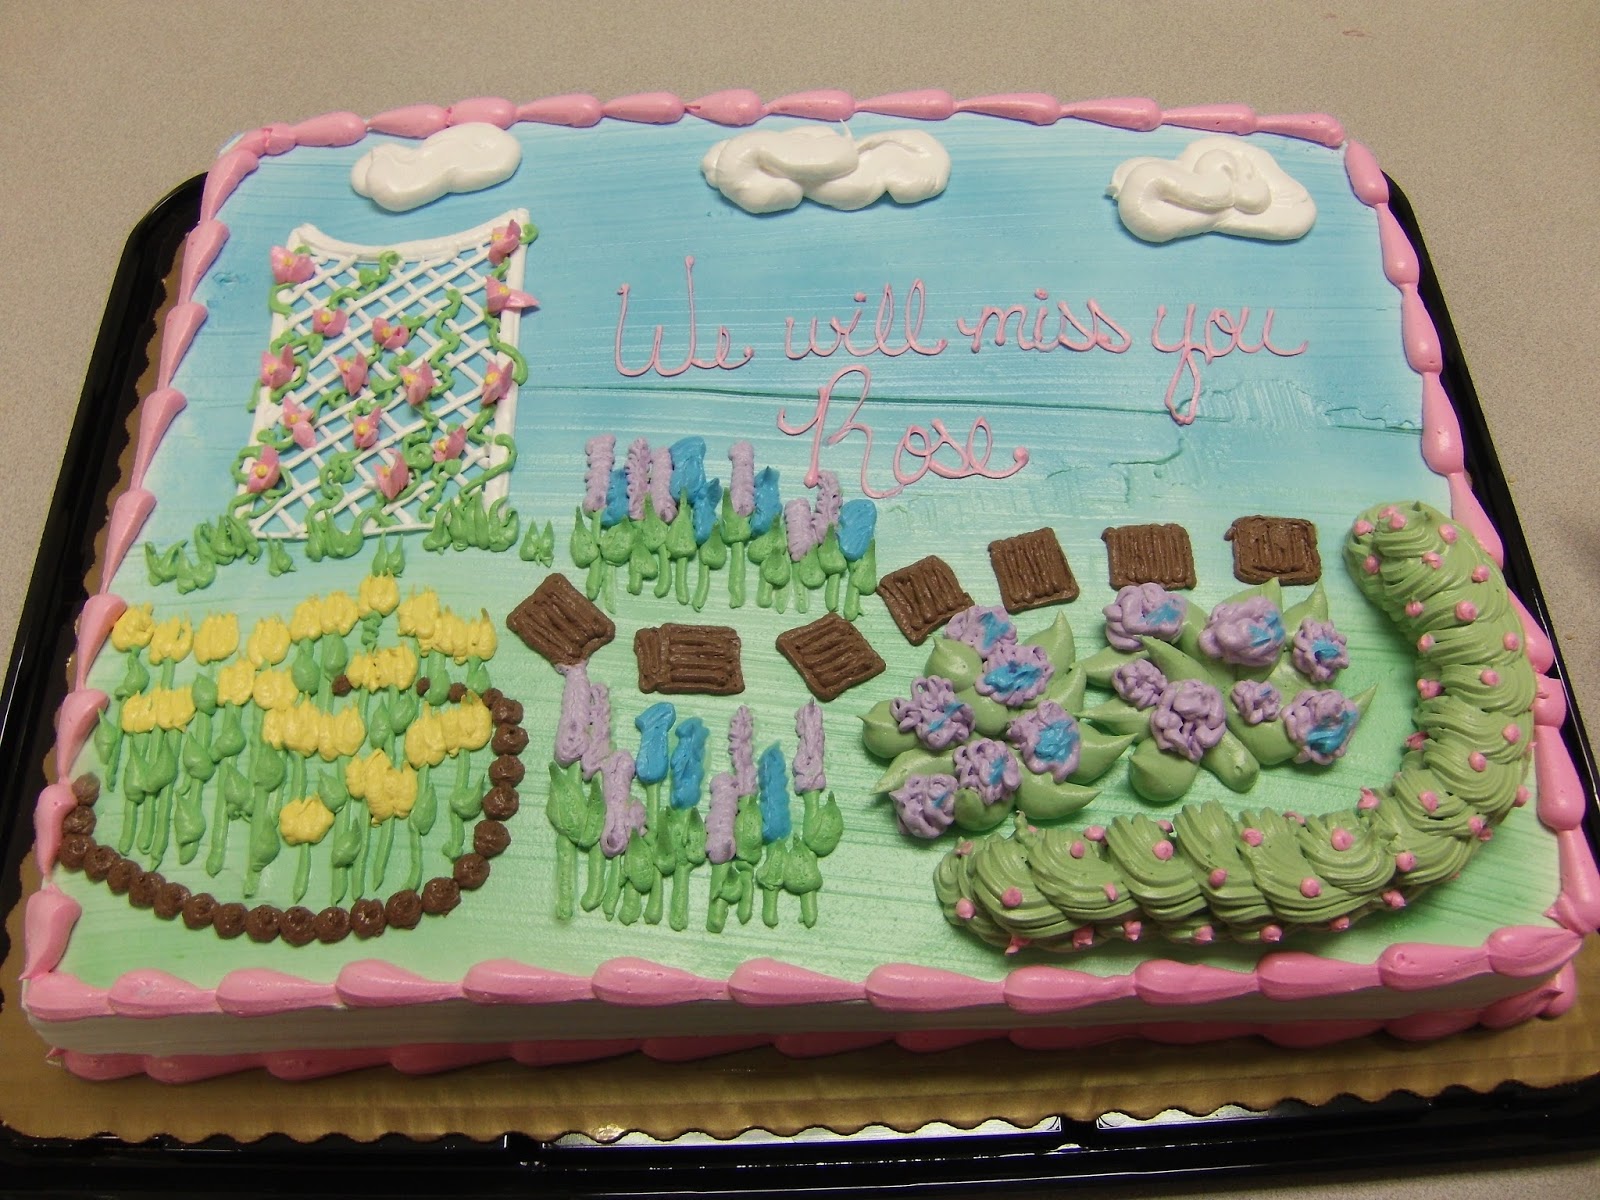
 The cake was made by Krogers.  We asked them to come up with a Garden Theme cake and this is what we got.  I think it looks awesome and is one of the best cakes I've had from Krogers.

 Gift:
Coming up with a gift was really hard.  What do you get someone that has everything?  We decided to go with the Garden idea again and just made a basket for her of things she could use.  
 I wanted something unique for all of your co-workers to sign to say good-bye besides a card that would more then likely be tossed into a box and forgotten.  We went with a coffee mug.  Everyone signed just a plan white mug with different color sharpie markers.  Allow the writing to dry 5 minutes before someone else signs so the ink has time to dry.  After it was finished I baked it in the oven at 350 degrees for 30 minutes.  I tested a small dot on the bottom to see if it would wash off and it stayed.  So now she has a mug she can use and think of us every time she drinks her coffee.
 After we figured out what to get her, the basket was rather easy.  Knee pad, flower wind things (can't think of the name right now), garden tools, bug candles, flower seeds, garden magazine, garden gloves and a bucket to put it all in.  Bug spray or sun screen would have been good but I didn't think of it at the time.
This party was both fun and sad.  I will miss my friend at work but am happy that she can now enjoy the time doing something she loves.  Hope you find some of these things helpful in any party that you may want to have.  

Wednesday, July 24, 2013

Lion King Baby Shower

Last weekend I put together a baby shower for my niece, Kasey.  Everyone knows that I HATE spending money on store bought favors so I like to design my own.  Below is party stuff and the information to help you make your own.

Guest Book:
Instead of using a guest book to sign in, I made a calendar for everyone to pick a date of when they think the baby will come. I made the calendar on PowerPoint and found the lion background print on Yahoo Images.  I then found a few baby Lion King images on yahoo and added it to the calendar to tie it in with the theme.  I found a picture frame at the Dollar Store and removed the glass.  I found pink hand and footprint stickers in the scrapbook section at my local Wal-Mart. These worked great.  Since this was an outside baby shower, I left bug spray out for our guests as a special touch.  


Table and Decorations:
I went with green table clothes and mixed and matched yellow and green plates.  I wrapped fork, spoon and knife inside of a napkin and tied with pick ribbon saying "It's a Girl."  I placed these inside a clear cup as sort of a center piece.

I had a pop-up shade tent that I hung plastic table clothes in different color to give the tent a more party feel.  This was a pain in the @** and I will not do it again :-)  I then blew up pink, green and yellow balloons and hung in the center with pink pacifiers hanging down with "It's a Girl" ribbon.  This was nice because every time the wind would blow you would here then cling together like a wind chime.


Games:
 For games I created a card style document which had all the games we were playing.  Below is the template I created.  I deleted Kasey's name and shower date to allow anyone else to use this idea for their party.  One game that is not listed is the play-doh baby.  Each person was given a small container of play-doh which I was able to find at Wal-Mart for 20 cents a piece.  Using the play-doh they had to create a baby.  It was pretty funny to see what everyone came up with.

Favors:
My favorite part of any party is the favors.  I always go over board but I love coming up with the ideas and creating each item.  For this party I did several different ones.  Since it was a Lion King party I had to do something with animal crackers.  I filled a snack size baggy with cookies and then taped it to green card stock.  I made the tags and printed on label paper and just peeled and stuck it to the card stock.  I love labels and use them like stickers ALL THE TIME!!!  Below is the template I created minus the name and shower date for anyone to use.
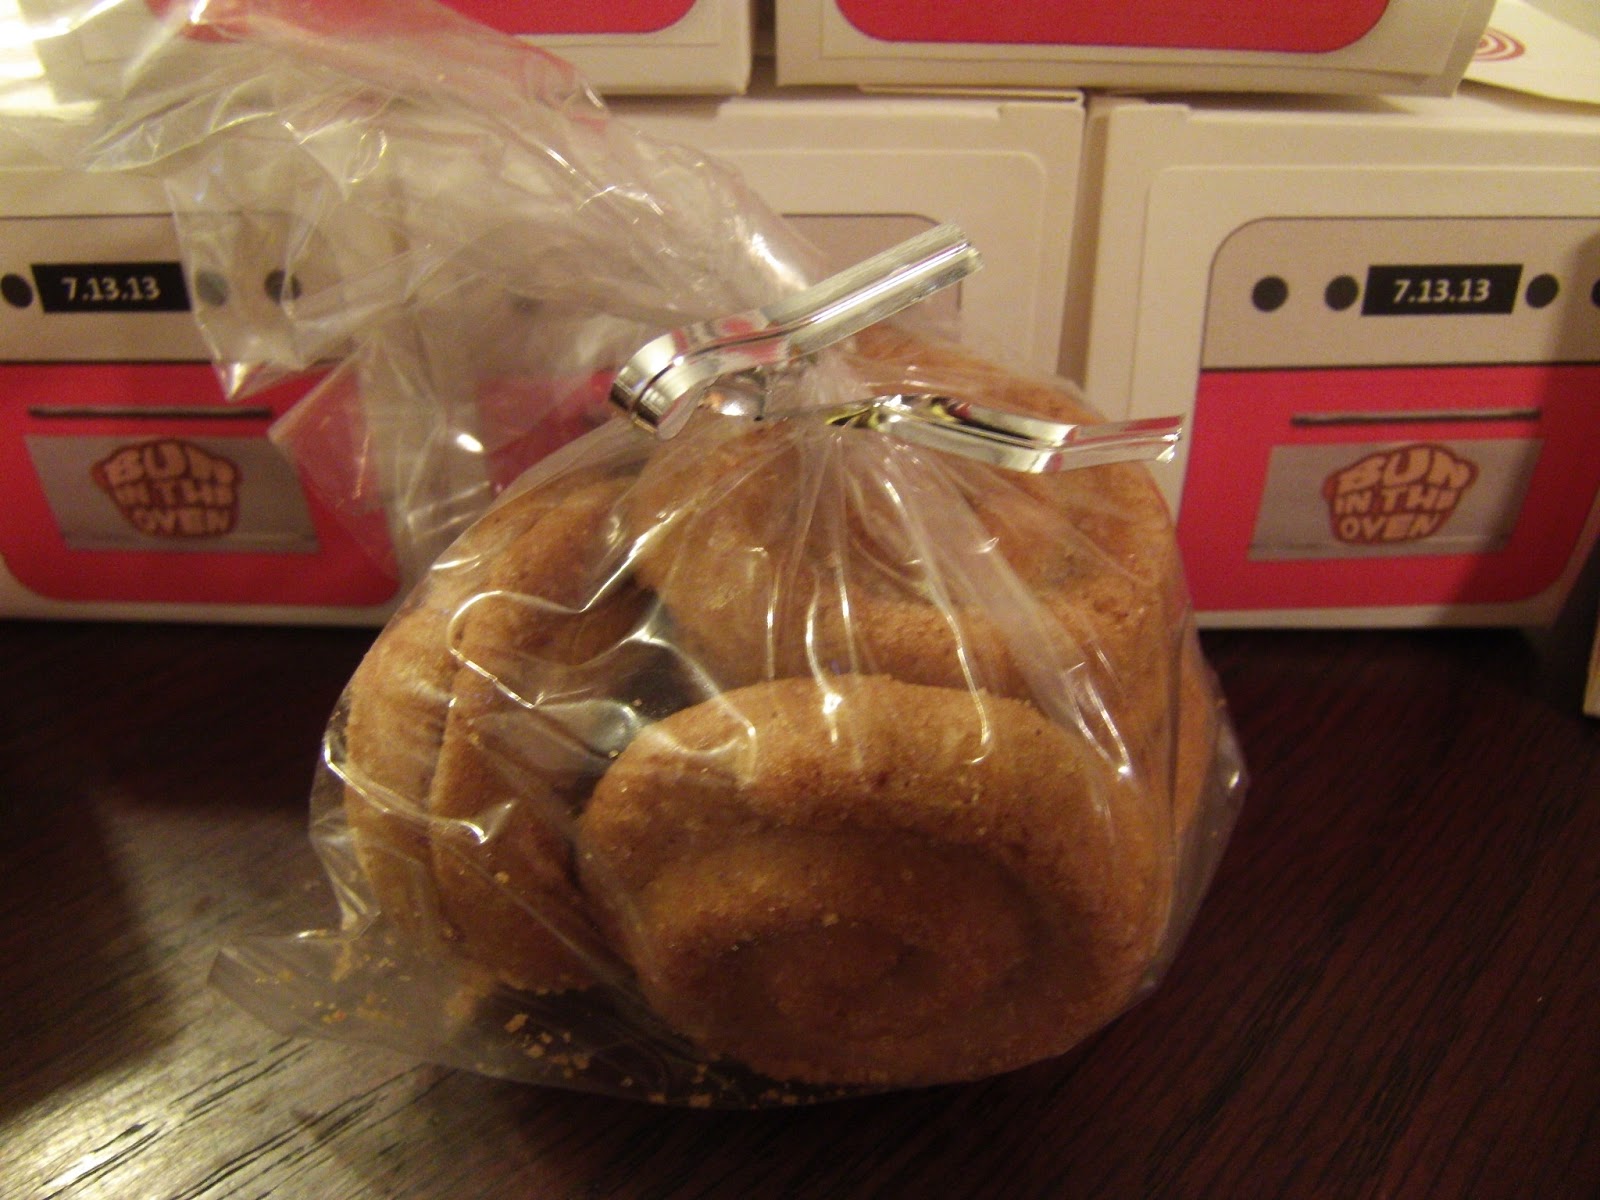
Next, I created "Bun in the Oven" boxes with Cinnamon bun cookies inside.  The small boxes I got on sale at Wal-Mart years ago.  I think I paid something like $5.00 for 100.  I use them all the time so if you find them on sale....grab them up!  I just happened to find the cookies by chance. I found the oven on Yahoo Images and added the "Bun in the Oven".  I also added the "time" as the date of the shower.  I created the stove top by using PowerPoint and then just found images of a towel and oven mitts to add.  I again used labels to print these images out on and then peeled and stuck onto the boxes. 

Last I created a peanut favor.  I found the boxes at the Dollar Store (10 for $1.00).  You can get a huge bag of peanuts for around $3.00 at your local store.  I also grabbed some yellow tissue paper to add a touch of color.  I found the monkey on Yahoo Images and added the saying along with Kasey's name and shower date.  I then printed it off on....you guessed it....labels! Below is the template you can use to make yours.

Other:
To add a little more fun to the party, I had a Diaper Change station set up where guests could leave a note for the parents on those late nights when all you want to do is sleep but your baby has other ideas.  Everyone had a blast coming up with cute things to say. 
 
For my first baby shower, I think this turned out really well and I was able to keep within a budget by doing a lot of things myself.  I hope this give others ideas of their own and you have has much fun as I did.

Until next time!


Friday, July 5, 2013

Backpacking Dolly Sods West Virginia


Earlier this week, I stuffed my backpack and headed toward Dolly Sods for an overnight hiking trip.  This was my first time at Dolly Sods and my first time backpacking by myself.  My pack weighed in at 30 pounds and contained; food, water, tent, sleeping bag, map, dog food and some other personal items. It took me an extra hour to arrive at my starting point, Bear Rocks Trail, because I missed a turn and had to backtrack some.  It was still early when I started off.  The plan was to hike in 6 miles and camp overnight and then hike out on a different path 8 miles back to the car.  It didn't work out as planned.
The start of the trail looked promising.  Scout, my dog, was so excited and wanted to stop every few feet to smell everything around him.  At the end of this path and a steep downhill rocky path and a small camping area off to the side.  Further down the hill is another camp site beside a creek.  Someone had taken the time to build rock seats around the campfire pit.  The ground was soft and cleared.  The trees overhead keep the sun from beating down on you. 
There was two paths off of this site.  Neither were marked but my map of the area told me to stay left.  I took the left path and ended up climbing up the mountain on a very small path with weeds up to your knees.  FYI, make sure you treat yourself and your pet before going into Dolly Sods. At the top of the hill was another campsite.  This one over looked a really nice rock pile and stream. 
I walked around this area for a while trying to find another path but came up empty so decided to retrace my steps back to the creek campsite and take another path.  This path lead to another steep climb but the path was wider and paved with tons of rocks.  This path goes on for miles of pretty sites and turns.  One of the paths brought me to a field of ferns.  It was just breathtaking to stand in the middle of nothing but all these ferns as far as the eye could see. 
After a short stop for some water and jerk, Scout and I continued climbing up the hill.  Mile after mile passed and I started to think I was lost because there was no more signs.  The path looked well used so I continued to walk.  I researched the park before coming and learned that bears will sometime make off with the path signs so I wasn't to worried.  More miles passed and I found myself on top of the mountain.
All the tree limbs were pointing one way.  It was pretty cool to see.  I read up on the wind pushing the trees so much that the limbs just grow that way.  I continued on, keeping an eye on my watch that counts miles walked and I knew that I was over my 6 mile limit and my campsite should have been close by.  The clouds were starting to turn and the wind was picking up.  I knew the rain was coming and wanted to get all set up before the rain came.  Miles after mile passed again.  The path became smaller and the mud was getting deeper and deeper.  I was starting to think I had taken a wrong path when I saw another couple and their dog ahead of me.  After a talk with them I figured out that I was only about 3 miles from my car.  I joined them on the hike for the next two miles, through the mud.  At the bottom of the hill to Bear Rock Trail, Scout and I took a much needed water and food rest.  
By the time I made it back to my car, we had hiked the complete trail all in one day.  14 miles with a 30 pound pack on my back.  Scout and I drove to Seneca campground to set up our tent.  After a really good meal of beef stew and tons of water, we retired to our tent just in time for the rain to fall.